Service Area

Massachusetts

Guaranteed Work

Qualified Staff

24/7 Emergency Service

Monday - Sunday

Author Archives: admin

Categories Posts

Why Are My Garage Door Sensors Not Lighting Up

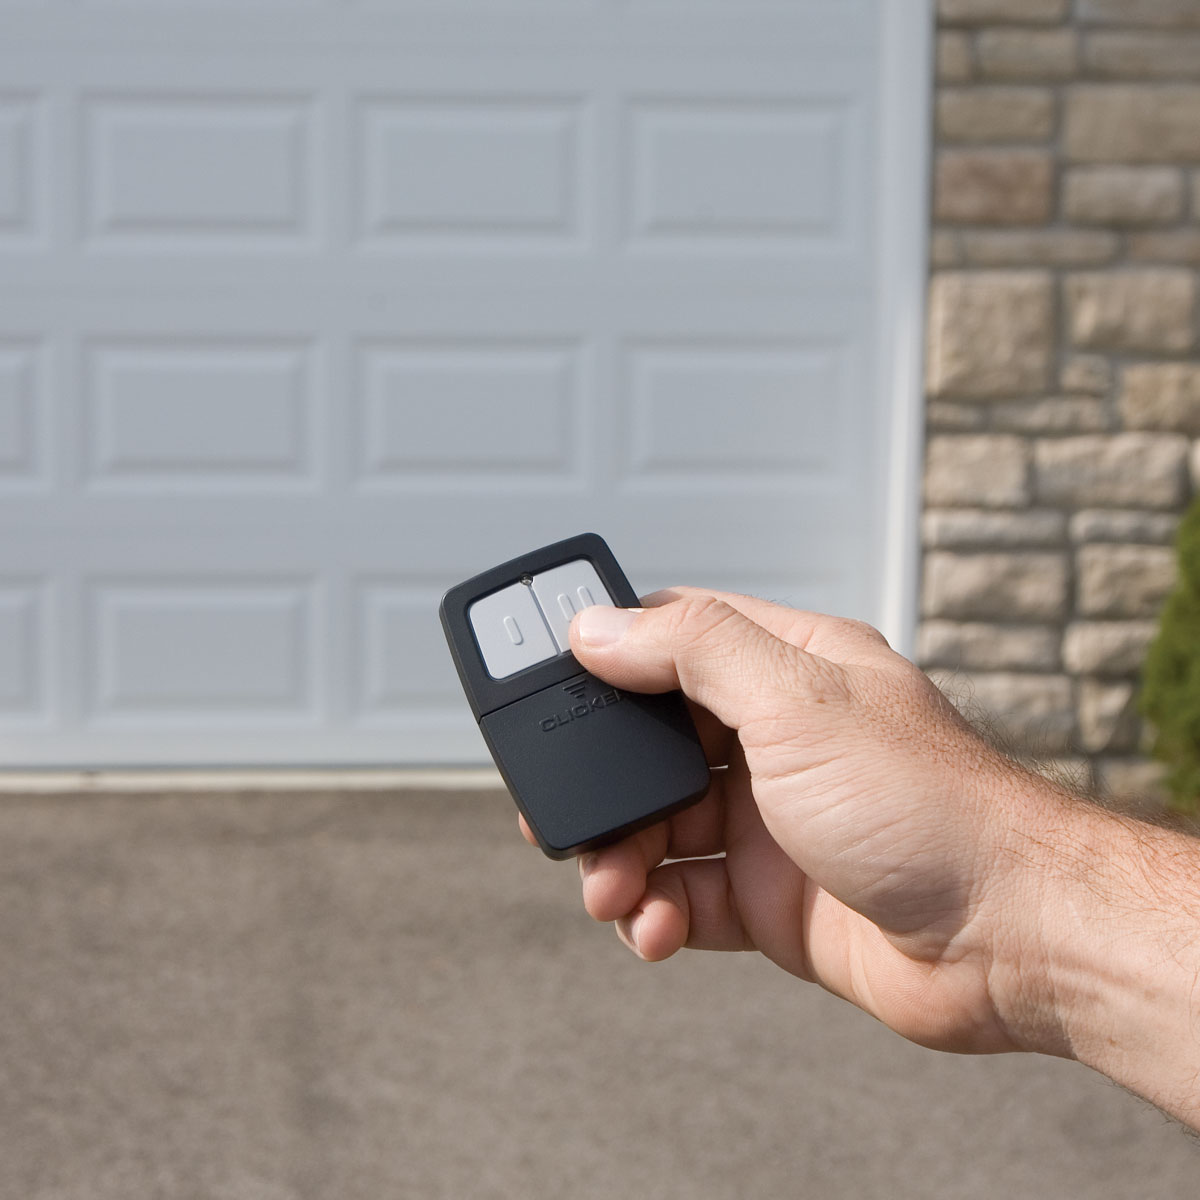
Have you ever pressed the garage remote control and watched in frustration as nothing happened? If you’ve noticed your sensors aren’t lighting up, you’re not alone. Many homeowners face this common issue, which can be both baffling and inconvenient. 

A close-up image of a black garage door safety sensor mounted on a white metal bracket with a green indicator light turned on, indicating proper alignment

The good news is that if you can recognize the reason, it could help you resolve the problem efficiently. Let’s check out some common answers to the question of why are my garage door sensors not lighting up and what to do in such a case.

What Do Garage Door Sensors Do?

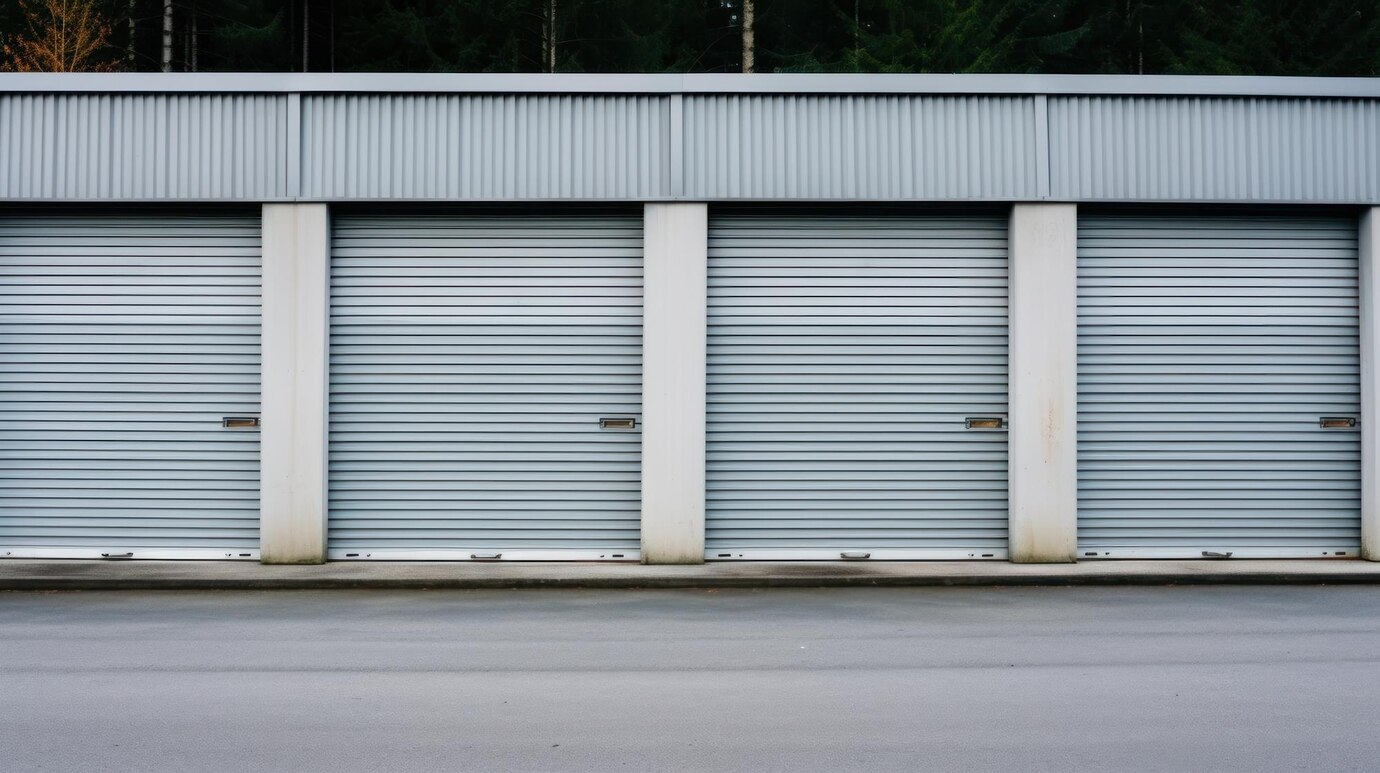
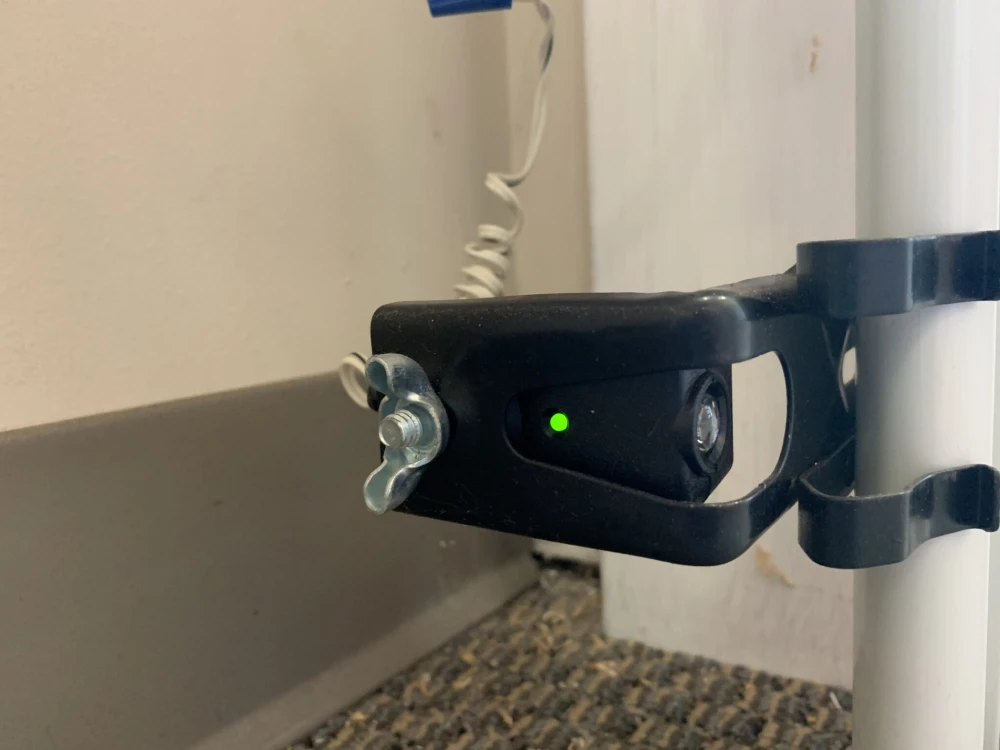
Safety sensors have an important role in ensuring safety and convenience. They’re positioned on either side of the garage door near the ground. These devices use infrared beams to detect obstacles in their path.

When you press the remote or wall button, the sensors communicate with each other. If something interrupts that beam, like a car or even a child’s toy, the door halts its closing motion. This prevents accidents and injuries.

Additionally, garage door sensors contribute to smooth operation. They help maintain proper alignment and prevent damage to both your vehicle and your garage structure.

Their functionality adds peace of mind and ensures daily safety while using your garage. Without them working correctly, you may face frustrating situations when opening or closing the door.

Common Reasons a Garage Door Sensor Stops Working

As the name suggests, a garage door safety sensor is needed for safe operation. When it stops working, it can lead to a hazard. Here are some common reasons for the failure:

  • Misalignment;
  • Dirt or debris blocking their path;
  • Wiring problems;
  • Power supply issues;
  • Aging or worn-out sensors;

One common issue is misalignment. Photo eye sensors need to face each other directly to function properly. Even a slight shift can disrupt the connection.

Another frequent culprit is dirt or debris blocking the sensor’s path. Dust, leaves, or spider webs can obstruct signals, which can prevent them from detecting motion accurately.

Wiring problems often arise, too. Frayed wires or loose connections may cause intermittent failures that leave your garage door unresponsive.

Close-up image of four exposed electrical wires with copper strands visible at the ends, covered in green, black, blue, and brown insulation, set against a light blue background

In addition, you may face issues with the power supply. If there’s an electrical interruption or blown fuse in your system, it could prevent the sensors from lighting up altogether.

Finally, there’s age as an important factor as well. Older sensors may simply wear out over time and fail without warning. Regular maintenance can help catch these signs early on.

How Can I Fix the Issue?

If your garage door sensors aren’t lighting up, start with a visual inspection. Check for any dirt or debris obstructing the sensor’s eye. A quick wipe with a clean cloth can often do wonders.

Next, ensure that the sensors are properly aligned. Misalignment is a common issue that’s easily solvable. How to realign garage door sensors? Simply gently turn them towards each other until they’re facing directly.

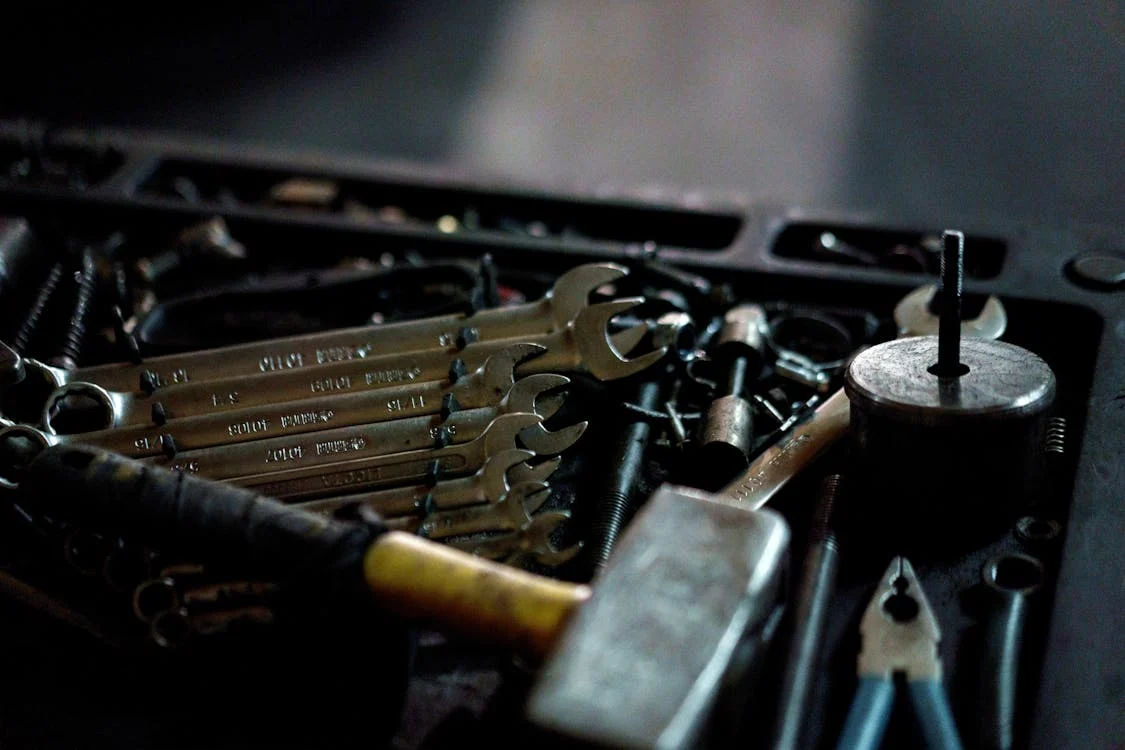
You should check the wiring as well. Look for frayed wires or loose connections that could disrupt power to the sensors. You may need to replace the damaged components if you notice any trouble.

A man wearing a dark denim shirt and black gloves working on an electrical connection indoors, with a ladder and blurred background in a brightly lit room

Sometimes, resetting the garage door opener motor unit also helps resolve issues. If you unplug it for about 30 seconds and then plug it back in, it might restore functionality. Lastly, check your circuit breaker to make sure there hasn’t been a trip affecting the power supply to your opener system. 

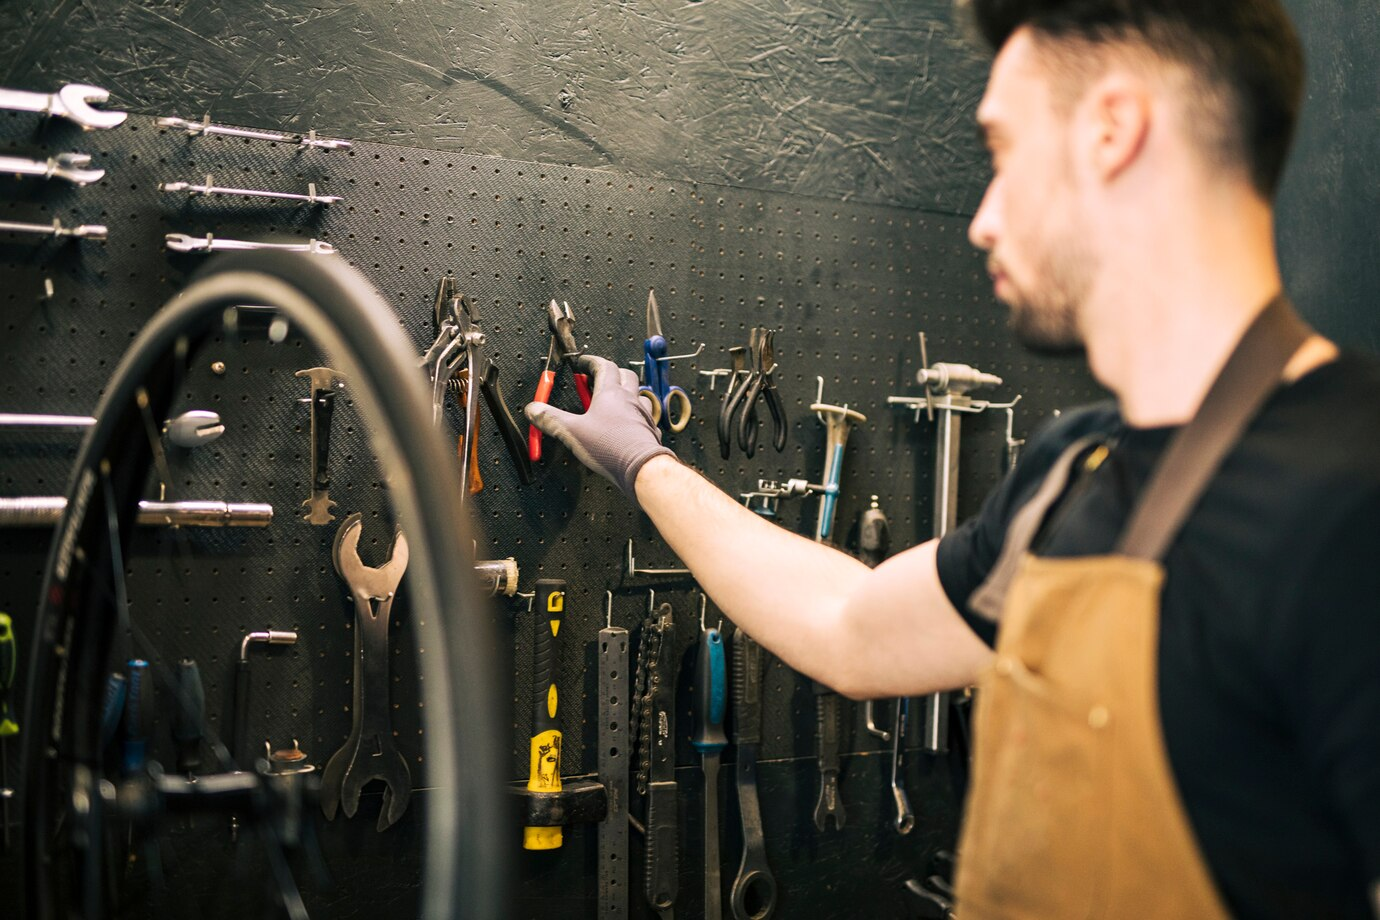
When to Call in the Professionals?

When it comes to safety sensors, sometimes the DIY approach isn’t enough. If you’ve tried troubleshooting the issue but both garage door sensors are not lighting up, it might be time to call in the professionals.

Professional technicians have specialized tools and knowledge that can help diagnose complex problems. They can quickly determine if there’s a deeper issue at play, such as wiring problems or faulty components. Additionally, they can ensure that everything is safely and correctly installed.

You should always seek assistance if you’re unsure about tackling electrical issues or feel uncomfortable with repairs. Safety should always come first when dealing with mechanical systems. So, if your efforts haven’t yielded results after a reasonable attempt, don’t hesitate to reach out to a garage door repair company.

Our skilled technicians are available 24/7 for all your garage door needs. Get in touch right away and book yourself a free estimate.

Categories Posts

Garage Door Remote Not Working

Have you ever been in a rush, only to find that your garage door remote has decided to stop working at that exact moment? It can cause a lot of stress and frustration. Unfortunately, this issue is more common than you might think. 

A hand holding a black garage door remote control in front of a closed white garage door with a stone wall in the background

Garage door remotes can fail for various reasons. If you know about them, you’ll be able to troubleshoot and possibly resolve the problem, which can save you time and stress. Whether it’s an oddly silent signal or a complete lack of response, let’s check out the reasons for your garage door remote not working.

How Does a Garage Remote Work?

First things first, let’s see how a garage door opener remote works. It operates using a straightforward yet clever mechanism. It communicates with the garage door opener through radio frequency signals.

When you press a button, the remote sends out a specific code to the opener. This code is unique and helps prevent unauthorized access. Most remotes use rolling codes for added security. Each time you press the button, it generates a new code from an internal algorithm. This means that even if someone intercepts the signal, they cannot replicate it later.

The receiver inside your garage opener then picks up this signal and activates the motor to open or close the door. And that’s how it works.

Reasons The Garage Remote Control Doesn’t Work

Several factors can lead to a malfunctioning garage remote. One common culprit is dead batteries. When you press the lock button, and nothing happens, you might want to check them. If this is the issue, just insert a new battery, and you’re good to go.

If you have a wall button, interference from other electronic devices can also disrupt signals. Things like Wi-Fi routers or even nearby radios may create unwanted noise that blocks communication between your remote and garage door opener.

A white router with four antennas and a silver combination padlock placed on top of it, symbolizing network security and data protection

Additionally, there might be some physical damage, which is another issue. A drop or spill can affect internal components, leading to unresponsiveness.

Sometimes, it’s not the remote but rather the receiver itself that has issues. Dust buildup or misalignment could prevent proper operation. If nothing so far has helped, troubleshoot the opener.

And if you recently changed codes for security reasons and find the garage door remote not working after the change, check out the settings. Ensure your remote is synced with the new codes. 

Solutions for When Your Garage Door Remote Stops Working

Now that we know the issues let’s see how you might solve them yourself. When your door remote stops working, there are several solutions you can try to get it back in action. 

First, check the batteries. Weak or dead batteries are often the reason behind this kind of malfunction. Replace them with fresh ones and see if that resolves the issue.

A graphic showing five battery icons at different charge levels, ranging from low (red) to full (green), illustrating battery life and energy status

Next, inspect the remote for any visible damage. Cracks or broken components can prevent it from functioning properly. If you notice any significant wear and tear, consider replacing the remote altogether.

If changing the batteries doesn’t help, and your remote appears intact, you might need to reprogram it. Refer to your garage manual for specific instructions on how to reset and sync it with the opener again.

Sometimes, interference from other devices or electronic appliances can disrupt signals between your remote and garage door opener motor. Ensure there aren’t any obstructions nearby that could interfere with communication, like large metal objects or electronic equipment.

It’s also worth checking if there’s a problem with the garage door opener itself. If none of these steps work, consult a professional garage door technician to diagnose more complex issues related to wiring or mechanical malfunctions. 

Our garage door repair services experts are available 24/7 for all your needs. Contact us today to book a free assessment.

Categories Posts

How Winter Affects Your Garage Door

a suburban neighborhood in winter, featuring two modern-style houses with light-colored siding and steeply sloped roofs partially covered in snow. The foreground highlights a lightly snow-dusted lawn and a paved driveway, while the sky above is cloudy with patches of blue peeking through. A white car is parked near one of the homes, emphasizing the peaceful residential setting. The overall atmosphere suggests a calm, cold day in a well-maintained community

Winter is a time for magic, with snowflakes all around and a cozy fire for rest and relaxation. But don’t forget about one important part of your home: the garage door. As temperatures drop and ice begins to form, your garage can face challenges that might not be immediately obvious.

You could be dealing with a garage door that won’t open or ice buildups between panels. However, there’s a solution for it all. Let’s check why you need winter garage door maintenance.

Impact on Garage Door Openers

As the name suggests, your garage door opens with an opener. However, winter can put it to the test. Cold temperatures can affect its performance and cause sluggish operation or even complete failure.

Lubricants used in garage mechanisms may thicken when exposed to freezing conditions. This makes it harder for your opener to function smoothly. If you notice unusual sounds or delayed responses, it might be time to check it out.

Additionally, electrical components can be sensitive to temperature changes. Batteries in remote controls and keypads may drain faster when faced with extremely cold temperatures. All this can affect your opener.

Frozen Ground

Winter brings a unique challenge when it comes to the ground beneath your garage. As temperatures drop, the soil can freeze solid. This affects how your garage door operates.

When you try to open or close the door, frozen ground may hinder its movement. You might notice unusual resistance or even difficulty in lifting it at all. This situation can lead to unnecessary strain on your garage door opener and other components. If you don’t solve it in time, this could result in costly repairs down the line.

You can try pouring a bit of hot water on the ground, just enough to melt the ice. However, be cautious. You don’t want to make a muddy puddle.

Ice Between Garage Door Panels

Another issue that comes with winter is ice between garage door panels. When temperatures drop, moisture can seep between and freeze. The result? A stuck door that refuses to move. And if you try to force it open, it could lead to damage or misalignment.

Moreover, this buildup can also affect insulation. An icy gap compromises your garage’s temperature control, which can potentially raise heating costs in adjacent areas. It significantly reduces the energy efficiency of your insulation.

The house has a dark wooden exterior with a steeply pitched roof and a garage at the front. A staircase leads up to a balcony, adding to the rustic aesthetic. The foreground showcases a snow-covered driveway and a young pine tree, while the sky above is partly cloudy, with sunlight filtering through the trees, creating a serene winter atmosphere

To prevent ice from forming, keep an eye on weather conditions. Regularly check the garage door seals around your panels as well. And if you find yourself dealing with frozen panels, try using a hairdryer or heat gun cautiously. Apply just enough heat to melt the ice without harming your door’s material.

Metal Contractions

Plummeting temperatures can lead to noticeable effects on your garage door’s metal components. As the temperature drops, metals contract. This natural occurrence can create gaps and misalignments in your garage door system.

When the metal contracts, you might notice increased friction during operation. A tight fit can make it difficult for the door to open or close smoothly. This struggle causes wear on the motor and may lead to premature failure.

This is why you need to keep an eye out for any signs of stiffness or unusual noises during colder months. Remember to lubricate hinges and tracks regularly, as it can help mitigate some of these contraction issues.

Impact on Keypad

Finally, another issue you may face with the winter approaching is your remote control not working. Cold weather often causes batteries to lose their charge faster than usual. This means you might struggle to access your garage when temperatures drop.

Moisture is another reason to worry about. Ice or snow can accumulate around the keypad, making it unresponsive. Additionally, the rubber seals that protect electronic components may become brittle and crack in extreme cold. This leaves your keypad vulnerable to moisture damage over time.

Schedule Your Winter Maintenance

You need to prepare your garage door for winter. This is essential to ensure its longevity and functionality. This is why you need to schedule a maintenance service, which can prevent many of the issues that arise during cold weather.

a collection of tools, including wrenches, bolts, and other mechanical items, likely arranged in a toolbox or workbench tray. The setting appears dimly lit, emphasizing the metallic sheen of the tools. The organized placement of the wrenches suggests readiness for mechanical or repair work

A professional technician can identify potential problems regardless of the type of garage doors. Experts will check the opener, lubricate moving parts, and adjust any misalignments caused by temperature fluctuations. Additionally, they will advise about cleaning as well. Removing debris from tracks and ensuring seals are intact helps keep cold air out while maintaining proper operation.

Book your free appointment today and let our garage door repair company do all the necessary checks. As they say, better safe than sorry, especially in the winter months.

Categories Posts

How to Fix Bent Garage Doors

Garage doors are a barrier between your home and the outside world. They’re part of your curb appeal, contributing to your property’s overall aesthetic. But what happens when they get a bend or a dent? 

Сlose-up of a yellow metal roller shutter door with a bold black stripe running horizontally through the center. The shutter shows signs of wear, with chipped paint and exposed material in some areas, giving it a rugged and industrial aesthetic. The textures and colors create a striking visual contrast

A mishap can turn into an eyesore, making you cringe whenever you pull into the driveway. Luckily, fixing it isn’t as daunting as it may seem. You can restore its former look without breaking the bank with the right tools and techniques. Let’s learn how to fix garage doors yourself and what some common garage issues are.

What Can Cause Garage Door Bends?

Besides issues with a garage door opener or torsion springs, you can face issues with garage door panels as well. First, let’s check what can cause bends so you can avoid them. Garage doors can bend for various reasons, often stemming from everyday use. One common culprit is accidental impact. A stray bicycle or even a car bump can leave unwanted marks.

Weather conditions also play a role. Extreme heat can warp materials, while heavy snow and ice might add undue stress on the panels. Over time, this pressure leads to bends that are hard to ignore.

Another factor is age and wear. As garage doors get older, their structural integrity diminishes. Rusty hinges or weakened springs contribute to uneven tension. We should also look at the improper garage door installation as another factor. Misaligned tracks may cause panels to twist under pressure during operation.

General maintenance neglect leaves doors vulnerable to damage from dirt buildup. Additionally, the problem might be and lack of garage door lubricant. You should schedule regular appointments with your preferred garage door company, to ensure your doors remain in pristine condition.

How to Fix Bent Garage Door?

There are several DIY garage door repair tricks you can use to fix the bent. The process can be straightforward if you know what to do. You should start by assessing the damage to determine how severe the bend is. Then, you can use one of the following methods:

  1. Hammer out the bend
  2. Use suction cups
  3. Straighten the panel with heat
  4. Fill the dent

Let’s check how to perform each of the steps.

Hammer Out the Bend

One effective method for dealing with a bent garage door is to hammer out the bend. This technique can work wonders for minor dents and irregularities. You should check the area closely and identify the bend’s depth and location. Make sure you have a rubber mallet or a block of wood handy. These tools will prevent further damage while you work.

Gently tap around the edges of the dent, focusing on stretching the metal back into shape. Work slowly to avoid creating new bends or worsening existing ones. Be patient, as it may take several light taps before you can see any improvements.

А hammer with a blue handle being used to remove a nail from a wooden surface. The hammer's claw is engaged with the nail, and the wood shows signs of wear and natural texture, suggesting a rustic or outdoor setting. The lighting emphasizes the tool's metallic surface and the grain of the wood

After addressing the dent, check for any remaining imperfections. If scratches or rough spots remain after your efforts, you may need a bit of sanding.

Use Suction Cups

Another clever method you can use is suction cups. With them, you can tackle minor bends in your garage door. These tools can create enough pressure to help reshape the metal without further damaging it.

First, ensure the surface of the door is clean and dry. This will maximize the grip of the suction cups. Press them firmly onto the bent area, making sure they adhere well. Then, gently pull on them while applying steady pressure. The goal here is to coax out that bend little by little. However, be patient. This might take some time for optimal results.

If you notice any creaks or pops during this process, don’t worry. This could simply be part of reshaping it back into place. Once you’ve achieved a more even surface, check for any remaining imperfections before moving forward with other extensive repairs.

Straighten the Panel With Heat

This method works particularly well on metal panels that have been dented or warped.

You should start by grabbing a heat gun. You can often find one at hardware stores or online. Set it to low and gently warm the affected area of the panel. Be careful not to overheat, as this could cause further damage or even paint blistering.

As you apply heat, keep moving the gun back and forth. The goal is to soften the material without melting it entirely. Once it’s warm enough, use a straight piece of wood or similar object against the bend.

А red heat gun placed on a wooden surface. The heat gun has a metallic nozzle and a black handle grip, with its cord and plug visible in the foreground. The light-colored wooden background highlights the vibrant red color of the tool and its clean, simple design. The image emphasizes the functionality of the heat gun, often used for DIY projects or repairs

Apply gradual pressure while continuing to heat it slightly until you see an improvement in its shape. Let everything cool down before checking your progress.

Fill the Dent

If you have damaged garage doors, you can also try filling the dent. Start by cleaning the area around the dent thoroughly. Dust, dirt, or grease can interfere with adhesion.

Next, choose a suitable filler for your garage door material. For example, metal or fiberglass fillers work well. Apply it carefully into the dent using a putty knife. Smooth it out to ensure it’s level with the surrounding surface.

Once it’s dried according to package instructions, sand down any excess filler until it’s even and flush with the door. After sanding, paint over the filled area to match your garage door’s color. You may need a few coats to cover and blend with its surroundings. Let each coat dry fully before applying another layer for best results.

When Should I Replace a Garage Door Panel?

If the damage is extensive, like deep dents or cracks that compromise structural integrity, replacement is your best bet. It can save you time and money in the long run.

Consider how visible the damage is. A panel that’s front and center may affect your home’s curb appeal more than one tucked away in a corner.

If the panel doesn’t align well with others after attempting repairs, it might be time for a new one. Misalignment can lead to further issues later on. You should also think about functionality. If your garage door struggles to open or close due to a damaged panel, it’s worth considering replacement soon.

If you’ve made multiple attempts at repairing it without success, investing in a new panel could be more cost-effective than ongoing fixes that don’t last long.

Calling Professionals For Help

Sometimes, despite your best efforts, a bent garage door can become tricky. If you’ve tried the methods outlined and still can’t achieve the results you want, it might be time to consider bringing in the professionals.

Garage doors are heavy and complicated systems that require expertise to repair properly. Professional garage technicians have the tools and experience to accurately assess the damage. They can identify underlying issues that may not be immediately apparent.

A workshop setting where a person, wearing a brown apron and gloves, is reaching for a tool from a pegboard mounted on a dark wall. The pegboard is organized with various tools such as pliers, wrenches, and screwdrivers. A bicycle wheel is partially visible in the foreground, suggesting a bicycle repair or maintenance context. The lighting creates a focused, professional atmosphere, highlighting the importance of tools in the workspace

Hiring an expert also saves you from potential injury or further damaging your garage door system while attempting repairs on your own. Skilled technicians can ensure everything operates smoothly again.

Don’t hesitate to hire a professional for garage door services. A garage door technician’s touch could restore functionality and peace of mind in no time. Contact us today for a free quote.

Categories Posts

How to Paint the Garage Doors

Your garage door is a focal point that can enhance your curb appeal. Painting might be the perfect solution if you’re tired of the same old color or simply want to refresh its look. 

A person pouring white paint into a roller tray on a black protective tarp, with painting tools such as a roller brush and a paint bucket nearby, indicating a garage door renovation

However, before you grab a brush and dive in, there are some essential things to consider. You need to choose the right paint to prepare for the job ahead. This is why you should know what you’re getting into, it will make all the difference. Let’s check out how to paint the garage doors efficiently.

All You Need to Know Before You Begin

Before you start painting, take a moment to assess the door’s condition. Look for rust, dents, or peeling paint that may need repair first. A clean surface is essential for optimal adhesion.

Next, consider garage door material type. It can be metal, wood, or fiberglass. Each requires different preparation and paint types. 

You should also consider the weather, as it can have a significant role in your project timeline. Aim for a dry day with mild temperatures to ensure proper drying times and avoid moisture issues. Finally, don’t forget about safety measures. Use protective gear like gloves and goggles when handling paints and chemicals.

At last, choose high-quality exterior paint designed specifically for doors. Your color choice can significantly impact how the entire home looks. This is why you should pick something that complements your style while being durable enough to withstand elements over time.

Tools And Equipment

You need to have the right tools before you start a garage door paint procedure. Let’s list some essentials:

  • Paintbrush
  • Paint roller
  • Painter’s tape
  • Safety gear
  • Tarp
  • Ladder

Start with a quality paintbrush and roller for even coverage. A brush is great for corners and edges, while a roller can speed up larger areas. You’ll also need a painter’s tape. This will help you achieve clean lines where the door meets other surfaces. It’s essential to protect those spots from stray paint splatters.

A metal paint can with blue paint dripping down the sides, accompanied by a blue paintbrush and a color swatch, set against a white brick background

Next, wear gloves to keep your hands clean while working. Safety goggles are also important if you’re sanding or scraping any old paint off beforehand.

A drop cloth or tarp will catch drips and spills and any excess paint, protecting your driveway or garage floor. An extension ladder might come in handy if your garage door is tall. After all, you want to reach every nook without strain.

Now that you have all the right tools let’s check how to paint a garage door step by step.

How to Paint a Garage Door – Step-by-Step Guide

First, start by cleaning the garage door thoroughly. Use a pressure washer or hose to remove dirt and grime. Let it dry completely before proceeding. Next, inspect the door for any damage. Fill in dents with auto body filler, then sand smooth once it’s dried. 

Then, apply painter’s tape along the edges and hardware to protect them from paint splatter. Choose a high-quality exterior paint suitable for your garage door material.

After everything is ready, use a roller or brush to apply the first coat of paint evenly. Work from top to bottom to prevent drips. Allow this coat to dry as per manufacturer instructions before adding a second layer. Once you add it, you’re done with painting.

A close-up of a paint roller with a yellow handle and a brush with an orange handle, placed on a colorful surface divided into yellow and blue sections for garage door painting

Additionally, you can consider applying a clear sealant over the final coat once it’s fully cured for an extra durable finish. This will help resist fading and wear over time while enhancing its appearance.

Choosing the Right Paint

Choosing the best paint for garage doors depends on the material of the door and the desired finish. Here’s a guide to help you select the right one:

1. For Metal Garage Doors:

  • Acrylic Latex Paint: Durable and resistant to cracking or peeling. Ideal for metal doors exposed to weather.
  • Oil-Based Paint: Offers excellent adhesion and durability, especially for older metal doors with potential rust spots.

2. For Wooden Garage Doors:

  • Exterior Acrylic Paint: Resistant to moisture and UV rays. Choose a satin or semi-gloss finish for added protection.
  • Stain with Sealer: For a natural wood look, use an exterior wood stain followed by a clear sealer.
Three metal paint cans with color-coded labels on their lids, arranged in a row on a white surface. A paintbrush with a beige handle rests on the first can, casting a shadow on the surface

3. For Vinyl Garage Doors:

  • Vinyl-Safe Paint: Prevents warping or peeling due to temperature changes. Use lighter colors to avoid heat absorption.

How to Maintain Painted Doors

Now that your garage door is freshly painted, you’ll want to keep it clean and fresh. Regular upkeep can extend the life of your paint job and protect your investment.

Start by cleaning the entire surface regularly. Use a soft cloth or sponge with a mild detergent mixed in water. This helps remove dirt, grime, and any other build-up that may accumulate over time. Avoid harsh chemicals as they can damage the paint.

You should also remember to check your garage door often for chips or scratches. If you notice any imperfections, address them immediately to prevent further damage. Touching up these areas promptly keeps everything uniform and attractive.

Consider applying a protective sealant every few years if it suits the type of paint used on your door. This extra layer shields against UV rays of direct sunlight and moisture while enhancing durability. Additionally, keep an eye on weather conditions that could affect your door’s finish, such as extreme heat or heavy rain. 

If you’re unsure about the maintenance, you should consider calling professional technicians. They can provide you with an assessment of your garage door issues and provide tips on efficient maintenance techniques. Book your free check today, and let’s keep your garage door beautiful and well.

Categories Posts

How to Choose a Garage Door Material

A pastel pink garage door with a closed rolling shutter, framed by matching pink planters holding green shrubs and small upper windows with decorative grilles, giving a soft and minimalist aesthetic

Finding the right material for your garage doors might seem like a minor detail, but it can significantly impact your home’s curb appeal and functionality. With so many options available, it might be difficult to know what you need. A quality garage door not only enhances the aesthetic value of your property but also provides durability and security.

So, how to choose a garage door material? Let’s explore the various options available to help you find the perfect fit for your space.

Why Do You Need Quality Garage Door Material?

Quality garage door materials are quite important for protecting your home. It’s the first line of defense against weather elements, intruders, and potential damage. A sturdy door can withstand harsh conditions while keeping your belongings safe.

Additionally, a well-made garage door enhances energy efficiency. Insulated options help regulate the temperature inside your garage and adjoining spaces, reducing heating or cooling costs.

The aesthetic appeal is another important factor. A high-quality material allows you to choose from various designs that can add to your home’s exterior charm. Whether modern or traditional, the right choice can transform the overall look of your property.

Furthermore, if you invest in durable materials, it will minimize maintenance needs over time. You’ll spend less on repairs and replacements while enjoying peace of mind.

Which Garage Door Material Options Are There?

Your choice of the types of garage door materials will affect your door’s durability and aesthetics. Several options are available, each with its unique benefits. We’ll list some of them before we start elaborating further:

  • Steel;
  • Aluminum;
  • Wood;
  • Fiberglass;

These materials cater to diverse preferences, ensuring there’s something suitable for every homeowner’s needs and style considerations.

Steel Garage Doors

Steel garage doors are a popular choice for many. They offer durability and strength, easily surviving harsh weather conditions. One of the standout features is their low maintenance requirement. Unlike wood, steel doesn’t warp or rot over time. A simple wash now and then keeps them looking fresh.

These doors also come in various styles and colors, allowing you to match your home’s exterior. Additionally, steel can be painted or finished to enhance its appearance further.

Another benefit is energy efficiency. Many steel doors have insulated options that help keep your garage comfortable year-round while potentially lowering energy bills.

Finally, security is another key advantage. Steel is considered one of the strongest garage door materials. With it, you can be sure that any potential intruder will be deterred, which is very important for those worried about safety. This is why steel doors are a common choice for both residential and commercial garage doors.

Wood Garage Doors

Wood garage doors offer a classic and timeless aesthetic. Their natural beauty adds warmth and character to any home. With various styles, from traditional carriage house designs to sleek modern looks, wood can fit almost any architectural style. You can also customize the finish to match your home’s exterior perfectly. As you can tell, they’re a preferred choice for residential garage doors.

However, wood requires more maintenance than other materials. You’ll need regular staining or painting to protect it from weather damage and prevent warping.

A wooden garage door with a paneled design set within a textured stone exterior wall, partially illuminated by sunlight casting sharp shadows

While wooden doors may initially cost more, many homeowners find that their charm justifies the cost. It’s an investment in curb appeal that pays off over time. Additionally, you can consider sustainable options like reclaimed wood for eco-conscious choices without sacrificing style or durability.

Fiberglass Garage Doors

For those seeking both durability and aesthetic appeal, fiberglass garage doors might be the right pick. They can mimic the look of wood, offering the charm without the maintenance hassles.

One key advantage is their resistance to dents, rust, and corrosion. This makes them suitable for various climates, including coastal areas where salt air can be damaging. Additionally, fiberglass has various customization options. Homeowners can choose from a variety of finishes and colors that enhance curb appeal while complementing their home’s design.

Fiberglass doors are lightweight yet strong. Their insulation properties help keep your garage temperature regulated, which can lead to energy savings over time.

However, it’s essential to consider potential fading under direct sunlight. While they perform well long-term, you’ll need regular maintenance to ensure they maintain their luster and functionality.

Aluminum Garage Doors

Finally, if you’re looking for durability and style, aluminum doors are a good choice. They offer a sleek appearance and beautifully complement modern architectural designs.

One of the standout features is that they’re lightweight. This makes them easy to operate while reducing wear on your garage door opener over time. Aluminum is also resistant to rust, making it an ideal option for coastal areas or regions with high humidity. Homeowners don’t have to worry much about corrosion affecting their investment.

Additionally, these doors come in various finishes and colors, allowing for customization that suits individual preferences. Insulated options are available too, which help maintain temperature control inside the garage.

With minimal maintenance required, just occasional cleaning, aluminum garage doors provide convenience alongside aesthetic appeal. You can get the best from both worlds – beauty and functionality.

How to Choose the Best Option?

Your choice of garage door materials will depend on several factors. Begin by assessing your climate. Durability is key for regions with extreme weather.

Next, consider maintenance requirements. Steel might require occasional rust treatment, while wood needs regular staining or painting to maintain its appearance. While you’re at it, think about aesthetics as well. Wooden garage doors offer a classic charm, while aluminum provides a modern look. Your home’s architectural style can guide this choice.

Don’t forget about the budget, it plays an important role, too. Prices vary significantly across materials. You need to be sure to factor in both initial costs and long-term upkeep expenses.

In the end, evaluate insulation properties if energy efficiency matters to you. Some materials offer better thermal retention than others, which can impact your energy bills over time.

Calling in the Professionals

If you’re stuck with the choice, seeking professional help can make all the difference. Garage door experts have extensive knowledge about different materials but also understand local weather conditions and architectural styles. They can guide you through your options based on functionality, aesthetics, and budget.

Additionally, hiring professionals ensures that all the measurements are accurate and that the garage door installation meets safety standards. Plus, they can offer maintenance tips tailored specifically for your chosen material. 

Investing in professional technician’s assistance means fewer headaches down the road. Their expertise can streamline the entire process, from selecting the ideal material to ensuring proper installation. This way, you’re guaranteed peace of mind, knowing you’ve made an excellent choice. Get in touch today, and our experienced technicians will help you make your choice with ease and safety.

Categories Posts

How to Decorate a Garage Door Safely

A festive scene featuring a red pickup truck loaded with snow-covered Christmas trees and decorations, parked in front of a brightly lit building with columns wrapped in garlands and string lights, surrounded by a snowy landscape

Your garage door serves a practical purpose, but it can significantly improve your curb appeal. This is especially true around the holidays, so we’ll bring a few tips for the holiday season. You can decide to spruce things up or just add a personal touch. Whatever the case, cute holiday decorations can make a big impact. 

However, you need to keep safety and damage prevention in mind when getting started. Let’s explore how to decorate a garage door safely and enjoy the upcoming season in the best way.

Damage-Free Decorating Tips

When you want to decorate your garage door, preserving its condition is key. First, you need to avoid any adhesives or nails that could leave marks or create holes. Instead, look for temporary solutions that you can easily remove once the festive season is over.

Additionally, consider using removable wall decor designed specifically for outdoor use. They come in a variety of styles and can add personality without the risk of damage. You can choose from light colors to accent or artificial colors. Whatever you choose, it will bring a dose of holiday magic to your doorstep.

If you plan to hang holiday decorations like wreaths or banners, opt for suction cups with hooks. These are gentle on surfaces and won’t leave behind residue.

Always test a small area first if you’re unsure about how a product will adhere. This extra step can save you from mishaps, ensuring your decorating efforts are hassle-free and enjoyable.

Use Magnet Garage Door Decoration

Magnet garage door decorations offer a fantastic way to add flair without causing any damage. These magnetic designs are easy to apply and remove, which makes them perfect for seasonal changes or themed events.

You can find everything from whimsical holiday scenes to elegant patterns in a wide variety of styles. Simply align the magnets on your garage door’s surface, and you’re good to go. Whether it’s a snowman or Santa with reindeer, your home will look amazing.

And the best part? They won’t leave behind sticky residue or scratches. This allows you to maintain your garage door in perfect condition and still enter the competition for the best garage door decoration in your neighborhood.

Finally, you’ll be happy to know that the installation is a breeze. It requires no tools or special skills. Just ensure the surface is clean and dry before applying. 

Use Clips for Christmas Lights

Using clips for Christmas lights is an effective way to add festive cheer without causing damage. Instead of nails, opt for specially designed clips that grip onto the edges of your garage door. They’re easy to install and won’t leave marks or residue behind.

Golden star-shaped ornaments hanging from strings of warm fairy lights, creating a festive and cozy atmosphere with a blurred background of softly lit windows

You should start by planning your design before you begin hanging lights. Whether you prefer a classic outline or something more unique, having a blueprint makes it easier. You can choose white lights or colored lights to show your festive spirit.

Once you have everything planned, attach the clips evenly along the top edge of your door first. Once secured, gently weave in strings of lights through each clip. This method keeps everything neat and tidy. 

Additionally, make sure to check that everything is secure once in a while, as weather conditions can change quickly during winter months. 

Hang Lights From the Gutters

Speaking of lights, if you don’t want to risk any damage, even with clips, you can hang them from your gutters. Sometimes, using clips will depend on the type of garage doors, as, for instance, metal doors are not suitable. 

This is why gutters are another great option. It can transform the exterior of your home without compromising your garage door. This method allows for a beautiful display while keeping everything intact.

A rustic wooden house adorned with warm string lights along the roofline and wrapped around the bare branches of nearby trees, creating a festive and cozy ambiance against the dark night sky

First, choose weather-resistant clips designed specifically for gutter use. These clips ensure that your lights stay secure and won’t cause damage to the structure.

Then, begin at one end of the gutter and work your way across. As you go, be mindful of spacing between the bulbs or light strands for an even look. Furthermore, it is important not to pull too tightly to maintain both safety and aesthetics. If you’re using string lights with a plug, make sure they are accessible yet discreetly placed.

Call Your Garage Door Repair Company For Help

When it comes to decorating, garage door safety should always be a top priority. If you’re unsure about the best methods, lack creative ideas, or just want peace of mind, don’t hesitate to reach out to your local garage door repair company. They have the expertise and the right tools to help you decorate without risking damage.

Professional technicians can provide tips on safe practices and different garage door trends. They’re well-versed in working with different types of doors, from aluminum garage doors to wood doors. 

Whether we talk about how to secure decorations or apply any changes but keep functionality, their knowledge is invaluable. Plus, they are well-equipped to handle repairs efficiently if anything goes amiss during your decorating process.

Christmas is just around the corner, and so are we. Reach out right away and our skilled technicians will be on their way to help in no time! Let’s create that winter wonderland on your garage door together!

Categories Posts

How to Seal Garage Door Gaps

Your garage is an extension of your home and can often have a large impact on your utility bills. If you’ve noticed drafts, pests sneaking in, or water pooling on the floor, the gaps around your garage door could be to blame.

A variety of construction tools for Garage Doors neatly arranged on a gray surface, including a hammer, pliers, a tape measure, nails, screwdrivers, a saw, and an orange safety helmet, showcasing essential equipment for construction or repair work

Sealing these gaps enhances energy efficiency, protects your belongings, and keeps unwanted guests at bay. You could need just a quick fix or a complete seal makeover. Whatever the case, this guide will show you how to seal garage door gaps and what to do if you’re stuck.

Tools You Need

Let’s begin with the basics. To effectively seal garage door gaps, you need the right tools at your disposal. These include:

  • Measuring tape,
  • Utility knife,
  • Hammer, pneumatic stapler, or drill,
  • Pry bar, 
  • Adhesive or caulking gun, 
  • Screwdriver set,
  • Nails (½” long),
  • Cloths and solvent. 

Gather these tools before beginning your project so everything flows smoothly as you work through each step. Now, let’s answer the question of how to winterize a door using these tools.

Bottom Seal

The bottom seal is a barrier against the various elements. It sits at the very base, where the door meets the ground. This area is often susceptible to water, dirt, and pests.

Over time, weather changes can wear down this seal. Cracks or tears may form, which can allow unwanted air and moisture to enter your garage. This is the right time to replace it. A replacement can be a simple yet effective solution.

A person using a table saw in Garage Doors workshop to cut a wooden board, with a focus on precision and safety in a woodworking environment

You’ll find bottom seals made from rubber or vinyl materials. They create a tight fit that keeps everything outside where it belongs. Installation usually requires minimal tools. You just need to measure everything accurately and cut to size before attaching.

Garage Door Threshold Seal

A garage door threshold seal is another essential component for maintaining your workspace. Similar to a bottom seal, this strip creates a barrier between the ground and the door, preventing water, dirt, and pests.

Installing a threshold seal can be quick and straightforward. Simply clean the area where it will sit to ensure proper adhesion. Many seals come with adhesive backing for easy application. These seals are made from durable materials like rubber or vinyl, designed to withstand harsh elements over time. They not only improve insulation but also enhance energy efficiency within your garage. 

This type of seal is even more important if you live in an area prone to heavy rain or snow. It protects your belongings while keeping your space tidy and dry throughout the changing seasons.

Garage Doorstop Weather Stripping

If we talk about how to insulate garage doors for winter, weather stripping is a must-mention. It fits along the sides and top of the garage door frame, creating a barrier against drafts, dust, and moisture.

You don’t have to worry because the installation of weather stripping is relatively easy. First, you can choose from various materials like rubber or vinyl, both offering excellent durability. Ensure you measure accurately to get the perfect fit.

A person using a white plastic smoothing tool to press and align material along a Garage Doors near a corner with a white molding, ensuring a clean and precise finish

When applied correctly, weather stripping improves energy efficiency and prolongs your garage door’s lifespan by reducing wear and tear caused by environmental factors. This is why you need to check this strip regularly for damage, which will help maintain its effectiveness.

Garage Door Panel Weather Stripping

Another way to winterize garage doors is with garage door panel weather stripping. This is an essential step to creating a comfortable environment inside your garage. This flexible material fills the spaces between individual panels, preventing drafts and moisture from entering.

Over time, wear and tear can cause these seals to degrade. By doing regular maintenance checks, you can ensure that you catch any damage early on. It can keep energy costs down and protect your belongings.

Once again, you shouldn’t have much trouble with the installation process. Simply remove the old strip and clean the surface before applying a fresh piece. A tight seal enhances insulation and improves security by making it harder for pests to get inside.

Additionally, pay attention to choosing high-quality materials. It will pay off in durability and performance. Whether you opt for rubber or vinyl strips, make sure they fit snugly within the grooves of your garage door panels for optimal results.

Brush Seal

A brush seal is a practical solution for sealing gaps around your garage door. It’s designed to keep out dust, debris, and pests while allowing for seamless door movement.

Made from durable bristles attached to a flexible backing, the brush seal conforms easily to uneven surfaces. This adaptability makes it ideal for older doors or those with slight misalignments.

Additionally, the installation is simple, too. Many homeowners can handle it themselves with minimal tools required. Just measure the gap, cut the brush seal to size, and attach it using adhesive or screws.

A person measuring the width of a Garage Door or reflective surface with a yellow tape measure, focusing on accuracy and alignment, with natural light illuminating the workspace

Another benefit? Brush seals help regulate temperature by reducing drafts. This means a more comfortable space year-round and potential energy savings on heating and cooling costs.

When Do I Need Help From Professional Garage Door Technicians?

Sometimes, DIY projects can become overwhelming. If your garage door has significant gaps that seem unmanageable or if you are unsure about the sealing process, you should seek professional assistance.

Professional garage door technicians have the experience and tools necessary for effective gap sealing. They can identify issues you might overlook and ensure all seals are fitted correctly. This is especially important if your garage door is old or damaged.

If you notice drafts, pests entering, or increased energy bills despite your best efforts at sealing, it’s a sign that you may need help. Don’t hesitate to reach out for expert advice. Sometimes, investing in professional service saves time and provides peace of mind, knowing the job was done right.

Categories Posts

How to Keep a Garage Warm in Winter

A carefully aligning and inspecting a garage door insulation on a drywall panel, ensuring proper positioning in a well-lit indoor environment

As winter comes, you can feel that chill seeping into every corner of your home, including the garage. This space can be used as a parking space for your car or a workshop for your hobbies. Whatever the case, keeping this area warm during the colder months can mean a lot.  

A cozy garage protects your belongings and creates a more comfortable space for those projects you’ve been itching to tackle. So, how to keep a garage warm in winter? Here are some practical tips to help you.

Insulate Garage Door

One of the most significant sources of heat loss in a garage is often the door itself. This is why the first thing to think about is insulation. Garage door insulation can drastically improve its thermal efficiency.

You can consider using foam board or reflective insulation specifically designed for garage doors. These materials create an effective barrier against cold air, ensuring that warmth stays inside longer. As long as you measure precisely and cut the material to fit your door exactly, you shouldn’t have any trouble.

Additionally, if your garage door has windows, don’t overlook them. Use insulated window film to add another layer of protection from drafts while still allowing natural light to filter through.

You should also think about weather-resistant seals. These can be installed around the edges and further improve the insulation effect by blocking any gaps where chilly air might sneak in.

And, of course, if you need any help with the installation, don’t hesitate to contact professional garage door technicians. They have the right tools and materials and can advise you on the best type of insulation for your space.

Insulate Garage Walls

Another thing to consider is garage wall insulation. It can drastically change the temperature inside during winter. It minimizes heat loss, keeping it warmer for longer periods. Additionally, you can save some money on utility bills if your garage is attached to the rest of the house.

First, make sure to check which type of insulation you need. Foam boards or fiberglass batts are popular choices. Both options provide excellent thermal resistance and are easy to install.

If you’re a DIY enthusiast, consider adding insulation between wall studs. This enhances warmth and dampens sound. It’s a perfect solution if your garage doubles as a workspace.

Don’t forget to cover any exposed pipes or wiring with insulating materials. Every little bit helps preserve the warmth you need when temperatures drop outside.

After installation, seal any gaps or cracks around windows and outlets. These small efforts can make a significant difference in maintaining your garage.

Add or Replace Weather Stripping

Weather stripping is another effective way to keep the cold air out of your garage. It seals gaps around doors and windows as a barrier between your garage and the outside world.

If you already have any weather stripping, start by inspecting it thoroughly. If it’s cracked or worn, it won’t do its job well. This is the moment to think about weather stripping replacement.  Old material can make a noticeable difference in temperature control.

When choosing new weather stripping, consider materials like foam or rubber. They are durable and provide excellent insulation properties. Measure carefully for an exact fit. This ensures maximum efficiency.

Installation is straightforward and requires minimal tools. Depending on the type you choose, you’ll need just some adhesive or nails.

A collection of shiny silver screws for Garage Doors scattered on a white surface, with a single black screw standing out to the right, emphasizing contrast in design and purpose

Once installed, check for any drafts during colder months. A snug seal will warm up your space and lower energy costs by keeping heated air from escaping elsewhere in your home.

Fill Up Any Gaps Around the Door and Windows

As we’ve already mentioned, gaps around doors and windows can be a major source of cold drafts. Even small openings allow chilly air to seep inside, making your garage feel like an icebox.

You should check the areas where the door meets its frame. Look for cracks or spaces that might have developed over time. A simple caulking gun can work wonders here, sealing those gaps effectively.

Insulating process of garage doors in winter

Don’t forget about window frames, too. Here, you might go back to weather stripping, which is another great option to enhance insulation in these areas. It’s easy to install and helps keep warm air from escaping.

For larger gaps, consider using foam sealant or even expanding spray foam for a snug fit. This creates an airtight barrier that protects against winter’s chill.

Add a Heater to Your Garage Space

Finally, if you’ve done all of the above and your garage still feels cold, think about adding a heater. There are various options available, such as:

  • Electric heaters
  • Portable propane heater
  • Natural gas heater
  • Infrared heating panels
  • Wood-burning stove
  • Kerosene space heater
  • Floor heating

Each type has its own advantages, depending on your needs and preferences. We’ll list just a few.

Electric heaters are often easy to install and can be quite efficient for smaller garages. They provide instant heat without the need for ventilation, which makes them a convenient choice. If you have a larger area or plan on spending extended periods of time in the garage, consider investing in a more powerful option, like a gas heater.

A variety of garage doors heating appliances, including a wall-mounted panel heater, a portable fan heater, an oil-filled radiator, and an infrared standing heater

Another popular solution is infrared heating panels that warm up objects rather than air. This method can create a cozy atmosphere quickly and efficiently while keeping energy costs down.

Before purchasing any heating unit, assess your garage’s size and insulation levels first. Make sure it’s suitable for your space so you get the most out of it during the cold winter months.

And, of course, if you face any garage door issues, contact our skilled technicians. We offer a free assessment and will advise you on the best options to keep your garage cold even when outside is freezing.

Categories Posts

5 Tips to Prepare Your Garage Door For Winter

As winter approaches, the time has come to prepare your home for colder days ahead. One area you should think about is your garage door. It may seem like it’s not necessary to deal with, but it actually has a big role in keeping your garage cozy and energy-efficient.

First things first, we’ll discuss garage door insulation as an essential part of garage door winterizing. It is necessary to maintain a comfortable temperature in your garage. But how do you insulate a garage door for winter?

A well-maintained garage door can help you go without costly repairs and ensure that everything inside stays safe from the elements. So, grab your toolbox, and let’s check out these 5 tips to prepare your garage door for winter.

Check and Replace Garage Door Insulation

First things first, we’ll discuss garage door insulation as an essential part of garage door winterizing. It is necessary to maintain a comfortable temperature in your garage. But how do you insulate a garage door for winter?

You should first check the material you already have (of course, in case you have any). Look for any cracks, gaps, or signs of wear and tear. If you notice it’s thin or damaged, you need to replace it right away.

There are several types of insulation available, such as polystyrene and polyurethane. They differ in effectiveness and cost but aim for options with high R-values for better thermal resistance.

Once you’ve chosen the new insulation, follow the manufacturer’s instructions carefully when installing it. Proper fitting ensures that cold air stays out while warmth remains inside. A garage door that’s well-insulated enhances protection and keeps everything safe from freezing. This is especially important for commercial garage doors, where you may keep temperature-sensitive items.

If you have any trouble, of course, you should get in touch with professional technicians. They can assist with the process and help you prepare your garage.

Check and Upgrade Weather Stripping

The next thing on your list should be weather stripping. This is essential for any garage door, especially as winter approaches. Gaps can let cold air in and warm air out, which means your heating system works overtime. So, let’s check how to seal garage door gaps.

You should begin by inspecting the existing weather stripping for any signs of damage. Look for cracks or areas where it has come loose. If you spot anything out of the ordinary, it’s time to replace it.

You should begin by inspecting the existing weather stripping for any signs of damage. Look for cracks or areas where it has come loose. If you spot anything out of the ordinary, it's time to replace it.

Additionally, you need to choose high-quality materials designed for cold weather. Vinyl, rubber, or foam options provide excellent insulation and durability. After you’ve made your purchase, you can start with the installation. The process is often straightforward:

  • Remove the old strip
  • Apply the new one securely along the edges of your garage door
  • Ensure a snug fit to block out drafts effectively

Don’t forget about windows, too! You should seal them as well with proper weather stripping, which can further enhance energy efficiency and reduce your utility bills. This is beneficial for residential garage doors, as the cold can impact your living space as well.

Caulk Garage Door and Windows

Another thing to consider when you decide to winterize the door of your garage is caulking. It can make a big difference in maintaining warmth.

First, check for gaps around the edges of the door and window frames. Even small openings can lead to drafts that chill your space. A high-quality caulk will create an airtight seal, which will prevent cold air from sneaking in.

When applying caulk, ensure surfaces are clean and dry for better adhesion. You can also use a caulking gun for precision. This tool allows you to apply even lines without mess. Then, smooth out any excess with your finger or a caulk smoothing tool.

Don’t forget to check older windows, too. They often need extra attention as their seals wear down over time.

Clean Garage Door And Store Items Safely

A clean garage door not only looks great but also functions better. Dust and grime can accumulate quickly, especially during the fall months. This is why you need to wash your garage door regularly, to keep it looking fresh and prevent corrosion.

While you’re at it, take a moment to declutter your space. Remove any unnecessary items that have piled up over time. This creates more room and makes accessing essentials easier when winter arrives.

While you're at it, take a moment to declutter your space. Remove any unnecessary items that have piled up over time. This creates more room and makes accessing essentials easier when winter arrives.

Additionally, you can use shelves or bins to store tools and seasonal items safely out of the way. Keep frequently used objects in an easily accessible spot for convenience. Furthermore, you can consider investing in protective covers for outdoor equipment, too. This can prolong their lifespan and keep them ready for use when spring comes around again.

Check and Lubricate Moving Parts

Finally, we need to mention regular garage door maintenance. Cold temperatures and snow can cause wear and tear on moving parts. This is why you need frequent checks to keep everything functioning smoothly.

You need to check the tracks, garage door rollers, and hinges for signs of rust or dirt buildup. A clean surface allows for better movement. Once you’ve cleaned these areas, apply a silicone-based lubricant to all moving parts. This will help reduce friction and prevent freezing in colder weather.

You need to check the tracks, garage door rollers, and hinges for signs of rust or dirt buildup. A clean surface allows for better movement.

Don’t forget about the garage door opener as well! Give it a thorough check-up, too, to make sure that it responds well when called into action.

Of course, if you need any additional assistance or wonder how to keep a garage warm in winter, don’t hesitate to get in touch. Our skilled technicians will assist with this and any other emergency garage door repair you need. Contact us right away.