Service Area

Massachusetts

Guaranteed Work

Qualified Staff

24/7 Emergency Service

Monday - Sunday

Author Archives: admin

Categories Posts

How to Decorate Garage Door for Christmas

The holiday season is right around the corner, and that means it’s about time to show happiness not just inside your home but outside as well. As you surely know, there are plenty of ways to decorate your garage doors and make your property look stunning. 

As you surely know, there are plenty of ways to decorate your garage doors and make your property look stunning. 

If you’re wondering how to decorate your garage door for Christmas so your property stands out in the neighborhood, we have the answer. Whether aiming for whimsical or classic elegance, decorating can be fun and easy. Let’s check out some garage door ideas that will help you with this task.

Garage Door Banners

One excellent way to make an impressive statement this Christmas is with garage door banners. These large door decorations can easily be hung over your garage, instantly transforming its look.

You should choose a festive design that shows your cheerful spirit. The options are endless, from a basic Happy Holidays banner to snowflakes or merry greetings. A banner showcasing bright colors and bold graphics can set a joyful tone for passersby.

Happy Holidays banner to snowflakes or merry greetings. A banner showcasing bright colors and bold graphics can set a joyful tone for passersby.

Wondering what about the installation? Don’t worry, it is simple. Many garage door Christmas banners come with grommets for easy hanging. Just ensure they’re securely attached to withstand winter winds.

Additionally, you can personalize your banner. Some companies offer customized designs featuring family names or favorite holiday quotes. This adds a unique touch that reflects your personality while embracing the season’s joy.

Magnetic Banners

If you go to any garage store or even browse online, you’ll find seasonal garage door magnets. They come in various designs, making it easy to find something that suits your style. Whether you need a single garage door Christmas banner or something larger, just make sure to know the exact measure.

Once you finish with the purchase and bring it all home, the installation is effortless. 

  1. Place the banner on your door 
  2. Straighten the magnets and let them do their work. 

There’s no need for tape or glue, which means you won’t have any sticky residue left behind. Additionally, these door decorations are durable and weather-resistant. You can enjoy them throughout the season without worrying about wear and tear from rain or snow. 

Another great feature is how easily they can be changed out. You can have a cheerful Santa design one week and a festive winter scene the next. Swapping them takes only moments.

Snowman Door Decoration

Snowman door decorations are a way to bring playful charm to your holiday display. It adds warmth and joy during the cold winter months.

You can use pre-made decorations or create your own with some creativity. A simple white tablecloth draped over a cardboard cutout can transform into an adorable snowman in no time. Additionally, you can add accessories such as a colorful scarf, button eyes, and a cheerful smile. Add twinkling lights around the edges for extra sparkle after dark.

Additionally, you can add accessories such as a colorful scarf, button eyes, and a cheerful smile. Add twinkling lights around the edges for extra sparkle after dark.

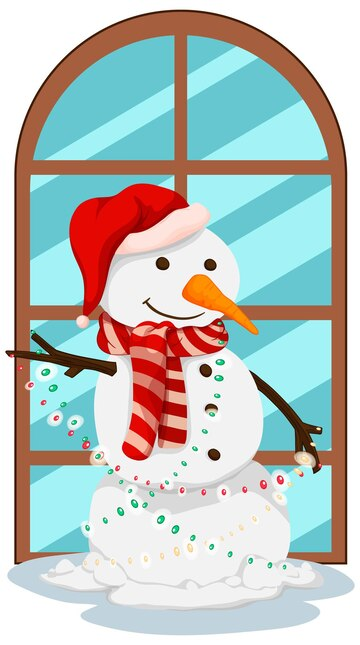
For an extra touch, consider using snowmen of different sizes for visual interest. Hang smaller versions at varying heights alongside larger ones on your garage door.

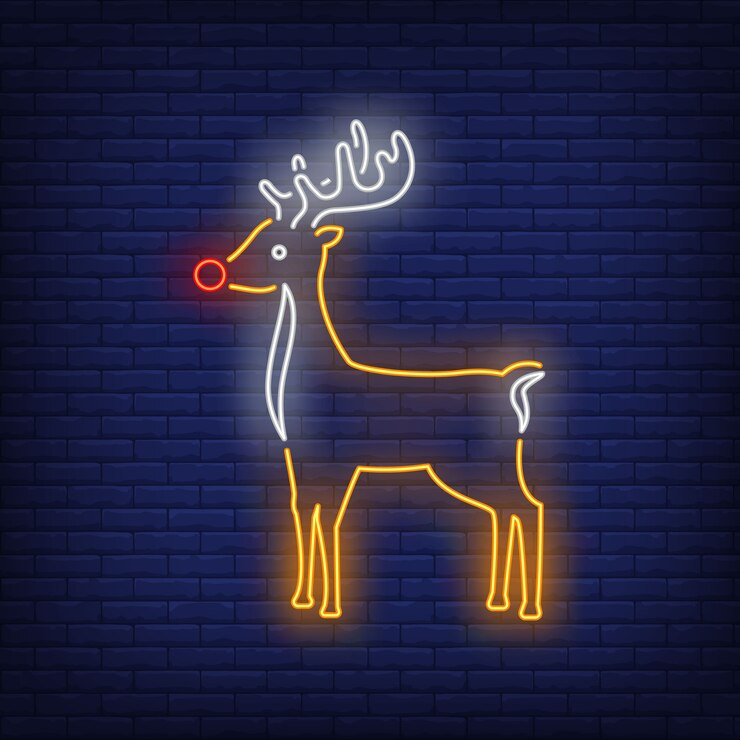
Reindeer Door Decorations

Let’s bring one more door decorating idea for Christmas. For instance, reindeer door decorations bring a whimsical touch. You can choose from various designs, whether it’s a classic wooden cutout or a vibrant inflatable. 

For an interactive twist, consider adding antlers made from twinkling lights. These charming additions will catch the eye and spread joy in your neighborhood.

For an interactive twist, consider adding antlers made from twinkling lights. These charming additions will catch the eye and spread joy in your neighborhood.

Don’t forget about wreaths with tiny reindeer ornaments for that extra flair. A mix of greenery and playful elements creates an inviting atmosphere.

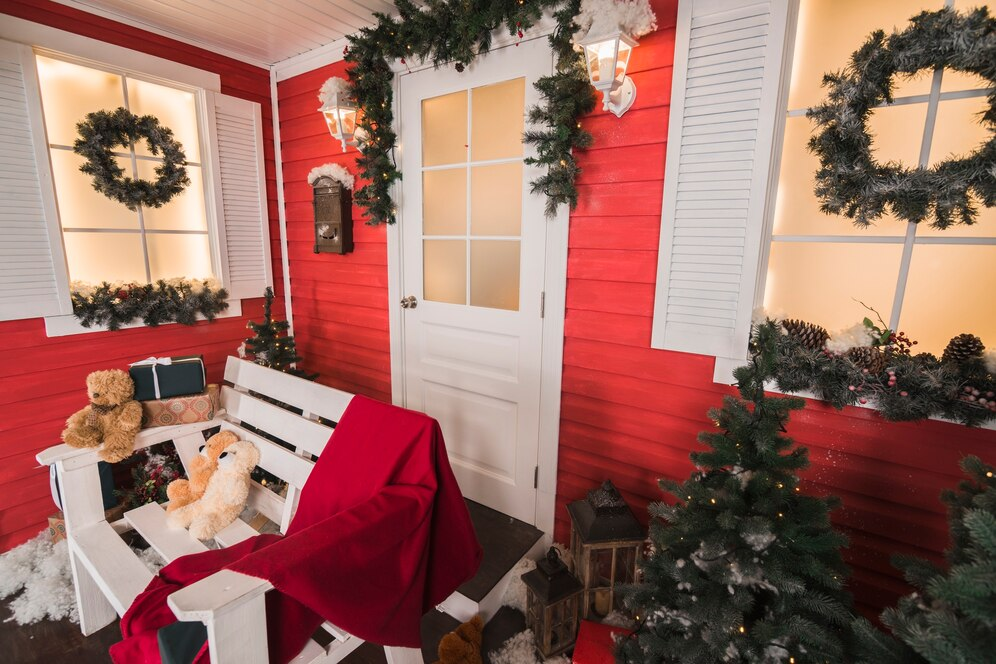
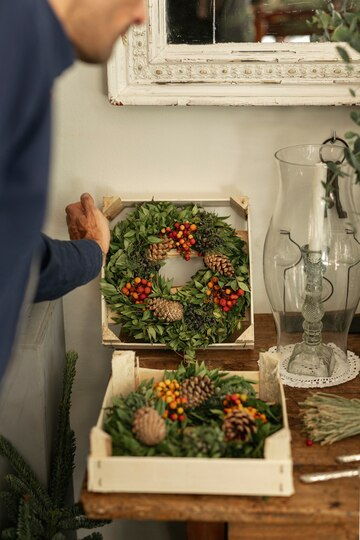
Christmas Trees and Wreaths

Speaking about it, nothing quite captures the spirit of Christmas like trees and garage door wreaths. Adorning your garage door with these festive decorations can create a warm and inviting atmosphere for everyone passing by.

A classic approach is to hang a beautiful wreath on the door. You can opt for traditional evergreen varieties or get creative with unique materials like pine cones, ornaments, or even burlap. The addition of twinkling lights around the edges will amplify its charm during nighttime, making your home stand out beautifully in the dark.

The addition of twinkling lights around the edges will amplify its charm during nighttime, making your home stand out beautifully in the dark.

If you want to go the extra mile, consider attaching mini Christmas trees flanking either side of your garage door. These could be real potted plants or artificial ones with tiny ornaments and lights. 

As you deck out your garage door this season, remember that it’s about expressing creativity while spreading holiday cheer! Whether you opt for garage door Christmas banners or any other front door decor, ensure you have fun during the holidays. And if you need any assistance, contact Garage Door Experts right away.

Categories Posts

How to Replace Garage Door Rollers

Your garage door provides convenience and safety to your home or business premises. But what happens when its components start to wear out? A noisy, jerky garage door can be a result of malfunctioning rollers and is quite frustrating. Fortunately, replacing them is a manageable DIY task that you can try to tackle yourself without breaking the bank.

This guide will walk you through each step of the process and answer the question of how to replace garage door rollers easily. Let’s start with the tools.

Gathering Tools

Before you start your garage door roller replacement, it’s important to gather the right tools. Having everything at hand will make the process smoother and more efficient. Some of the things you might need include:

  • Ladder
  • Socket wrench
  • Screwdrivers
  • Pliers
  • Safety gear
  • Lubricant

You’ll need a sturdy ladder to reach high areas of your garage door. In addition, you’ll need basic hand tools. Grab a socket wrench set, as well as screwdrivers. Both flathead screwdriver and Phillips one will do the trick. Pliers might come in handy if you’re dealing with stubborn rollers.

Remember to take safety goggles, which will protect your eyes from dust and debris. You’ll also need gloves, which are essential for keeping your hands safe while handling metal parts.

Finally, consider having lubricant on standby for when you finish installing new rollers. It keeps things running smoothly long after you’ve completed the task. With all this at hand, you’re ready to tackle those old rollers.

Choosing the Right Replacement Rollers

Before you start to replace garage door rollers, you need to find the right replacement. There are various types available, each designed for specific needs.

First, consider the material. Nylon rollers tend to be quieter and require less maintenance than metal ones. However, metal rollers may offer greater durability in high-traffic situations. Besides these, you can choose plastic rollers or steel rollers, all depending on your needs and preferences.

Next, check the roller size. Ensure it matches your existing setup to avoid complications during installation. Roller diameter typically ranges from 1-inch to 2-inch options, so measure carefully before purchasing. Don’t overlook weight capacity, either. Heavy doors need sturdier rollers to function properly over time. Look for products that specify their load ratings.

You should research different brands and read reviews. Quality can vary significantly across manufacturers, but finding a reputable one can save you headaches in the future. 

Replacing Rollers: Step-by-Step Guide

Now that everything is ready, you can begin the process. First, disconnect the garage door opener. Safety is key here, as you want to avoid any accidental activations.

Next, open your garage door manually until it’s fully raised. Secure it in place with a clamp or vice grip on both tracks to prevent movement while you work.

Using pliers, carefully remove the old rollers from their brackets. You may need to unscrew some components for easier access. However, take your time. Rushing can lead to mistakes, which can further lead to injuries.

Once removed, align your new rollers into their respective spots and secure them tightly. Ensure each roller fits smoothly within its track before moving forward.

After installing all new rollers, gently lower the garage door and test its operation. Listen for any unusual noises that might indicate misalignment or improper installation. Adjust if necessary for optimal performance.

Difference Between Top and Bottom Rollers

Garage door rollers come in two primary types: top and bottom. Each has their own role in the garage door operation.

Top rollers are located at the upper section of the door. They guide the door as it opens and closes, ensuring smooth movement along the track. Their design allows them to pivot easily, accommodating any slight changes in alignment.

On the other hand, bottom rollers sit at the base of the garage door. These provide stability and support during operation. Unlike their counterparts above, they often incorporate a more robust mechanism to handle added weight and pressure from opening or closing.

With these differences in mind, you can decide which ones need replacing when there are any issues. If you can identify where the wear occurs, you’ll be more likely to replace everything that’s necessary to be replaced.

When to Replace Rollers

Over time, rollers can wear out or become damaged. But how do you know when is the right time for a replacement?

First, listen for unusual noises like grinding or squeaking. These sounds often indicate that your rollers are struggling. If you notice uneven movement as the door opens or closes, it’s a sign that something isn’t right. It could be that the garage door roller is off track, which means you need to align it. If it doesn’t help, replacement might be your solution.

Next, make sure to inspect the rollers regularly. Look for signs of rust, cracks, or flat spots on their surface. Even if they seem to function well initially, deterioration can lead to bigger issues later.

Another red flag is when the garage door gets stuck frequently during operation. This could mean there’s a misalignment caused by worn-out rollers. This problem requires attention sooner rather than later.

How Much Does It Cost?

Cost can vary based on several factors. On average, you might spend anywhere from $50 to $200 for replacement parts alone. The price will depend on the type of rollers you choose and whether any other garage door repairs are needed during the process. High-quality nylon rollers tend to be more expensive but offer smoother operation and less noise than metal ones.

If you’re handy and opt for a DIY approach, you’ll save on labor costs. Just ensure you gather all necessary tools beforehand and follow safety precautions while working with your garage door system.

If you’re considering hiring a professional technician, labor costs may add an additional $100 to $300. However, you’ll have peace of mind knowing that your doors are thoroughly inspected and that every issue has been resolved. In case you’re having any problems with your garage doors, contact our skilled technicians. We offer all kinds of repair services at affordable prices.

Categories Posts

How to Install Garage Door Opener

Garage door opener installation can appear complicated, but it’s really not. With the right tools and a bit of guidance, you can do it in no time. 

White garage door view from the inside

Whether you’re upgrading an old system or installing one for the first time, we’ve got you covered. Our blog post will give you all the information you need and answer your questions about how to install a garage door opener easily. If you still need help, we’ll offer advice on choosing professional installers, too.

Choose the Right Garage Door Opener

Choosing the right garage door opener is the first and most important thing to ensure a smooth installation. First, consider the type of door you have. It can be sectional, tilt-up, or roller. Each type of garage door pairs best with specific openers.

Next, think about how often you’ll use your garage door. For frequent usage, consider a belt-driven opener known for its quiet operation. If noise isn’t an issue, chain-driven models are sturdy and cost-effective.

Don’t forget to check the power units as well. Battery backup features can save your life during power outages in case you have an electric garage door opener. If you’re feeling a bit tech-savvy, look into smart garage technology. Many modern openers offer smartphone compatibility that allows you to control your garage from anywhere. 

Prepare It for Installation

Now that you have the right opener, it’s time to pick all your tools. You’ll typically need:

  • step ladder;
  • screwdriver;
  • pliers;
  • wrench set;

Having everything ready will make the job smoother. Next, clear out any clutter in your garage area. A clean workspace means fewer distractions and more safety.

A stepladder with tools on it

Don’t forget to read through the manufacturer’s instructions carefully. Each model can have unique requirements or steps that you need to take for proper setup. Also, check if you need any additional materials, such as a garage door bracket or mounting hardware. It’s better to have everything on hand than to pause midway through installation.

Of course, wear protective gear like gloves and goggles. Safety comes first!

Secure Electrical Plug

Once you have the garage door opener and the right tools, you’ll also need an electric plug. Check if you have an electrical outlet nearby. If not, you will need a power cord. Just ensure it can handle the garage door opener’s voltage requirements. Most standard openers operate on 120 volts, but you can always check the specifics in the manual.

The hand that pulls the plug out of the socket

Next, ensure that the outlet is not overloaded with other devices. Too many appliances plugged in at once can lead to circuit problems or even tripped breakers. Once you’ve confirmed all this, plug in your garage door opener. Make sure it fits snugly and there are no loose screws.

Check Out All the Parts of the Opener

Now, take your time to learn about all the components of your garage door opener kit. Each part has to be connected correctly to ensure smooth garage door operation.

First, check the motor unit, which is often mounted on the garage ceiling. This powerhouse drives everything else and is usually equipped with lights for added visibility when you open or close the door.

Next, examine the rail system. It connects directly to the motor and guides your garage door along its track. Look for any bends or damages that could hinder performance.

Lastly, you need to check safety features like photoelectric sensors. These are needed to prevent accidents by stopping or reversing movement if something obstructs their path. It may not be necessary as part of the functionality system, but it gives you peace of mind. 

Gather all accessories, such as garage door opener remotes and wall controls. Ensure they work properly before starting installation. 

Put Together Main Assembly

After you’ve checked everything, you should assemble the main components of your garage door opener. Start by laying out all the parts on a clean surface. This will help you identify everything and ensure nothing is missing.

Garage door opener installation usually begins with the motor assembly. Attach any necessary brackets according to the manufacturer’s instructions. You need to follow these guidelines precisely for optimal performance.

Next, connect the rail to the motor head. The rail guides your door as it opens and closes, so make sure it’s securely attached and properly aligned. Double-check that all screws are tightened firmly but not overdone. This could cause damage or misalignment later on. With this assembly complete, you’re nearly done.

If you feel overwhelmed, this may be the time to call for professional installation. Note that it’s completely understandable to need garage door technicians in this case.

Install Blocking on the Ceiling

If you’re ready to proceed, the next step is to install blocking on the ceiling. This provides added support and stability for your unit.

First, figure out where your opener will hang. Look for rafters or joists that can effectively bear weight. If necessary, use a stud finder to ensure you’re attaching to solid wood.

Once you’ve found the right spots, cut pieces of blocking material, typically 2x4s, into lengths that fit snugly between rafters. Secure them using lag screws or heavy-duty nails. Make sure they are level and firmly attached. This will help prevent any wobbling when the door operates.

After securing the blocks, double-check their alignment with your chosen garage door opener location. 

Connect the Opener to the Garage Doors

Now it’s the time to connect your garage door opener to the actual door. You first need to make sure that the garage door is fully closed. This helps align everything properly.

Then, locate the manual release cord on your garage door mechanism. Pull this cord to disconnect it temporarily from the system. You’ll need to do this before attaching anything.

Now, grab the bracket or arm that comes with your opener kit. Attach one end of this arm securely to the top section of your garage door using screws provided in your toolkit. Once attached, connect the other end of the arm to the trolley on your opener rail. Make sure it clicks into place so you know it’s secure.

Test its movement manually first, then reconnect any cords you need for automatic operation. If you notice any misalignment during testing, you may need to adjust some parts.

Install Additional Features

Once your garage door opener is connected, consider adding features that can improve security. While these features can add to the cost of the garage door, they can come in quite handy. For instance, the integration of smart garage technology can make a significant difference. Many modern openers support Wi-Fi connectivity. This allows you to control the door from your smartphone.

White car and a hand with a phone

Another valuable addition is a battery backup system. If the power source goes out, you’ll still have access to your garage without hassle. It’s particularly useful during storms or emergencies and will give you peace of mind knowing you’re covered.

Once again, we’ll mention garage door safety sensors. These detect obstacles and prevent accidents, which is especially important if children or pets are around.

Remote controls and keypads mounted outside provide an entry with an access code that your family members can use without the physical key. Some systems even offer voice activation through smart home devices.

Test Altogether

Once everything is assembled and installed, it’s time to test your garage door opener. Make sure that the remote control and wall switch are within reach. Press the button to see if the door opens smoothly without any hitches. Observe how well it closes as well, as there should be no jerking or sudden stops.

Check for any unusual noises which may indicate misalignment or other issues. If you have safety sensors, ensure they function properly by waving an object in their path while closing the door. If they work right, the door will stop immediately.

If all is well, check all the additional features you’ve integrated into your opener system. Test them out individually, too, just to be on the safe side.

A handyman with a drill repairing a white graage door

If you notice any issues during the test phase, you can try troubleshooting them. If, however, you cannot, or if you’ve found this to be a challenging task, it might be the right time to call for help. You may need professional installers to assist you with the matter. Our garage door service is at your disposal. Contact us, and we’ll be there in no time.

Categories Posts

Expanding Your Garage Door Remote Control Range for Improved Access

Has it ever happened to you to reach your home or business premises, try to use your remote control, but nothing happens? Frustration sets in as you realize the distance is just too far for that little device to reach its target.

Close-up of an Ethernet switch or router with multiple Ethernet cables connected to ports labeled eth0, eth1, and eth2, with green indicator lights signifying active connections

The limited remote range can turn into an annoying ordeal. It can be caused by blocked signals or outdated technology. Many factors contribute to this inconvenience. Luckily, there are effective ways for expanding your garage door remote range for improved access. Let’s explore what causes limited remote signal range and how you can regain control.

What Causes a Limited Remote Range?

Several factors can cause a limited remote range for your garage door opener system. One common issue is interference from other electronic devices. Wi-Fi routers, cordless phones, satellite TV dishes, and baby monitors often operate on the same radio frequency as garage remotes, causing signal disruption.

Physical obstructions also might be the cause of trouble. Thick walls, metal structures, or large vehicles parked nearby can weaken the remote’s signal before it reaches the opener.

Another factor is distance itself. The farther you are from the garage door sensor, the less effective your remote becomes. Additionally, if your remote battery is low or your remote is outdated, those issues can also lead to diminished performance. 

Solutions for Expanding Your Remote Range

Expanding the range of your garage remote can make life significantly more convenient. There are several effective solutions to consider. We’ll list just a few before we explain more.

  1. Install a stronger antenna
  2. Set up a repeater system
  3. Upgrade to a new garage door opener

Finally, don’t underestimate the value of consulting with garage door experts. Their insights can lead you toward personalized solutions tailored specifically to your needs.

Stronger Antenna

One effective way to improve your garage door remote range is by upgrading to a stronger antenna. The antenna is the key player in sending and receiving signals between the remote and the opener.

A black external antenna with a long cable and a metal mounting bracket, designed for boosting signal reception for devices such as routers or communication systems

If you’re currently using a standard antenna, you can switch to a high-gain option, which can significantly enhance signal strength. These antennas are designed to capture signals from farther away.

Installing an upgraded antenna isn’t as complicated as it sounds. Many options are available that easily attach to existing systems without extensive modifications. However, before you make any changes, check compatibility with your current opener model. A little research will ensure you pick the right product for your needs.

Repeater System

A repeater system is another thing you can try to improve the remote control range. This setup captures the signal from your remote and amplifies it, allowing you to open your garage door from a greater distance.

The installation of a repeater is typically straightforward. You’ll need to place it within the existing garage door opener range. Once positioned correctly, it will relay commands between your remote and the opener.

There’s a wide range of garage door remote models, so you need to be sure to choose one that is compatible with your specific opener. You can find different options that cater to different distances and obstacles like walls or trees.

Upgrading to a New Opener

Old garage door opener remotes can be a major source of frustration. They often come with limited range and outdated technology. Installation of new automatic garage opener could provide the solution you need.

Modern options offer advanced features like rolling codes, which add security and reliability. Many models also include Wi-Fi connectivity, allowing you to control your garage door from anywhere through an app on your smartphone.

A person holding a smartphone with various app icons displayed on the screen, standing in a modern living room with a TV and furniture in the background

With improved power and efficiency, newer openers respond faster and have longer ranges than their predecessors. Say goodbye to those frustrating moments when you’re left standing outside, fumbling for your remote.

Expert Assistance from Garage Door Experts

If you find yourself facing persistent issues with a remote control, you might need a professional garage door technician. They have the experience and knowledge to diagnose problems accurately. They understand the nuances of different models and systems.

An experienced technician will assess your situation thoroughly. They can identify the sources of interference, pinpoint outdated equipment, or do something else entirely. This way, you won’t waste time experimenting with solutions that might not work.

Our experts also stay up-to-date on the latest technology in garage door openers and accessories. If there are better options available on the market today than what you currently have, we’ll guide you toward those choices.

If you’re ready to improve your access and convenience through enhanced remote range capability, consider consulting your local garage door expert. Give us a call, and we’ll be there in no time to provide a free quote.

Categories Posts

Why is Your Garage Door Opening and Closing on Its Own?

Have you ever stepped outside only to find your garage door opening and closing on its own? It can feel like something out of a horror movie. One minute, everything is normal. The next, your garage seems to have developed a mind of its own. Besides the discomfort, this issue can also be a reason for concern.

A black-and-white two closed industrial roller doors on a plain building, with a no-smoking sign and dim overhead lighting, creating an urban, minimalist atmosphere

However, this problem is more common than you may think. Let’s check some common reasons behind this unexpected phenomenon so you can resolve it quickly.

Common Reasons For Garage Door Opening and Closing Issues

Garage doors can act up for various reasons, leaving homeowners puzzled and frustrated. However, most issues stem from several problems. We’ll list them here so you know what to troubleshoot first.

  1. Misaligned sensors
  2. Malfunctioning remote control
  3. Security breaches
  4. Technical malfunctions

Each of these factors contributes differently, but all the result is the same. And you may need a garage door professional to resolve it.

Faulty Sensors

Garage door sensors are an important part of the safety. They ensure the door opens and closes without any safety hazards. However, when these sensors malfunction, they can trigger erratic behavior.

A common issue is misalignment. If the safety sensors aren’t facing each other with their infrared beam pointing directly, it may cause the door to open or close unexpectedly. Additionally, dirt and debris on sensor lenses can also impede their function. A quick wipe might solve the problem.

Sometimes, wiring issues arise, too. Frayed wires or loose connections disrupt signal transmission between the sensors and the control system. This is why you need regular garage door maintenance checks to catch these problems before they escalate.

Remote Control Malfunction

A malfunctioning remote control can lead to unexpected garage door movements. This often happens when buttons get stuck, or the battery is low. A simple fix might be just changing the batteries.

A person holding a black remote control with buttons labeled for opening, closing, and stopping a garage door, with a white garage door featuring decorative windows in the background

Sometimes, interference from other devices can confuse your remote. Signals from nearby electronics may cause your door to respond erratically. If this occurs, try moving those devices away or check for any sources of radio frequency interference.

Additionally, dirt and grime on the remote’s buttons can create problems, too. This is why you need to clean it regularly to prevent unwanted commands.

If you’ve ruled out these factors but are still facing issues, you can reprogram your remote. This can help restore normal functionality. Each model has its reset instructions. Follow them carefully and you might just resolve the problem.

Security Breach

A garage door that opens and closes on its own can be alarming, especially if you suspect a security breach. Thieves are becoming more tech-savvy, and they often exploit vulnerabilities in remote systems.

If your door is responding to commands without any input from you, it’s time to consider the possibility of unauthorized access. This could happen if someone has duplicated your remote control or hacked into your system via smart home features.

If you suspect an unauthorized breach, take immediate action. Change the code for your garage door opener. Most models have a reset button for this purpose, so don’t hesitate to use it. Additionally, examine all entry points around your property. Secure windows and doors leading to the garage may deter would-be intruders from attempting further breaches.

Technical Malfunction

Finally, if none of the reasons above can apply to your situation, you may deal with a technical malfunction. These things often come out of nowhere, leaving you scratching your head.

Your automatic garage opener might experience glitches due to outdated software or hardware components. Such issues are not always easy to spot but can lead to erratic behavior.

Additionally, worn-out gears and motors may struggle with performance, too. When these parts begin to break down, they might send mixed signals that confuse the system.

Another possibility is interference from other electronic devices nearby. If you’ve recently added new gadgets around your home, they could cause garage door opener issues.

What Can I Do?

If your garage door is opening and closing on its own, you need to take immediate action. Check your sensors, remote control, and everything else we’ve mentioned above. These are easy problems to spot, and you can mostly resolve them yourself.

A person in a blue jumpsuit opening a comprehensive toolkit on a workbench, containing a variety of tools such as wrenches, screwdrivers, pliers, and sockets, organized neatly in a black case

If you’ve ruled out common issues but still face trouble, you should consult garage door technicians. They can diagnose any technical malfunctions that may arise from wiring or motor unit problems in the system. Contact our garage door repair company today, and we’ll provide you with a free quote. We’re here for all your garage troubles.

Categories Posts

Expert Tips For Troubleshooting a Jammed or Non-Working Garage Door Lock

A lock that refuses to move can turn a simple errand into a frustrating ordeal. Whatever you need your garage door for, dealing with this issue is never on anyone’s to-do list. However, diagnosing the issue doesn’t have to be daunting. 

A close-up of a door lock with a set of keys inserted, showing various locking mechanisms and a modern handle design, emphasizing security and functionality

With these expert tips for troubleshooting a jammed or non-working garage door lock, you’ll be well-equipped to tackle this common problem head-on. Let’s see which issues can be resolved on your own and when you need professional garage door services.

Common Causes of a Jammed or Non-Working Garage Door Lock

A jammed or non-working garage door lock can stem from various issues. We’ll list them here so you can see which problem may be yours. Note that this issue equally hits commercial and residential garage doors.

  1. Rust or dirt buildup in the locking mechanism – Over time, grime accumulates and interferes with the smooth operation.
  2. Misalignment – If your garage door isn’t properly aligned, it can place unnecessary pressure on the lock, making it difficult to operate.
  1. Temperature changes – Extreme cold can cause metal components to contract and stick, while heat may cause them to expand and create friction.
  2. Lack of lubrication – A dry lock mechanism struggles to function smoothly.
  3. Wear and tear – Over time, wear and tear can result in broken internal parts that impede proper locking functionality. 

Once you identify the issue, you will be able to find an effective solution. If not by yourself, then certainly with a professional garage door technician.

Steps for Troubleshooting a Faulty Lock

If you’re dealing with a stuck garage door lock, there’s no place to panic. You should take some steps to determine what happened and how to resolve it. Here’s what to do.

Check the Lock Mechanism

First, examine the lock mechanism itself. Sometimes, dirt or debris can accumulate and obstruct its function. Additionally, inspect the keyhole for any visible obstructions. A quick look can help you determine if something is causing a blockage.

Next, check if the tumbler moves smoothly. If it feels stiff when inserting your key, this could be a sign of internal issues that need attention. Also, ensure that the locking bolt aligns properly with the strike plate on your garage door frame. Misalignment can prevent effective locking and unlocking.

Finally, don’t forget to test both manual operation and remote control if applicable. This will help pinpoint whether it’s an issue with just one method or if your electric garage door opener is in trouble too.

Clean the Lock Mechanism

You should clean the mechanism as part of your regular maintenance routine. If, however, you missed it recently, it’s time to do it now. Dust, dirt, and debris can accumulate here, making it difficult for the mechanism to function properly.

Start by removing any visible grime around the lock area. A soft cloth or microfiber towel works well for this task. Additionally, consider using compressed air to blow out dust from hard-to-reach places for deeper cleaning. This helps clear away stubborn particles that may be obstructing movement.

Cleaning supplies arranged on a white surface, including pink rubber gloves, a green spray bottle, yellow and red sponges, a pink cleaning cloth, and a bottle of cleaning solution, emphasizing household cleaning tools

If necessary, apply a small amount of rubbing alcohol on a cotton swab to clean intricate parts gently. Avoid using excessive moisture, as this could lead to rust or corrosion.

Lubricate the Lock Mechanism

Another part of regular garage door maintenance should be the lubrication of all moving parts. A well-lubricated lock reduces friction, making it easier to turn the key or engage the latch.

First, choose a suitable lubricant. Graphite powder or silicone spray is a great choice, as it doesn’t attract dust and dirt. Avoid oily products, as they can gum up over time. Then, apply a small amount of lubricant directly into the keyhole and along any moving parts you can access. It’s best to work in thin layers because too much can create a mess.

After applying, insert your key gently and turn it back and forth. This helps distribute the lubricant evenly throughout the mechanism. Finally, wipe away any excess with a clean cloth to prevent buildup. 

Check for Loose Components

A jammed garage door lock can sometimes be traced back to loose components. When parts are not tightly secured, they can shift or misalign, which causes problems with the locking mechanism.

You should check the screws and bolts that hold the lock in place. If any appear loose, tighten them carefully. This simple step can often resolve issues you might be facing.

Three screwdrivers with black and yellow handles placed on a wooden surface surrounded by scattered screws and washers, illustrating tools and hardware for assembly or repair

Next, check for brackets or plates around the lock area. These should fit snugly against the door frame. If they’re out of alignment or wobbly, it may prevent proper locking.

Don’t forget to examine hinges and other moving parts as well. Any looseness here could affect how smoothly your garage door operates.

Check for Proper Installation

If nothing so far works, check the installation itself. A garage door lock must be installed correctly to function properly. If it’s misaligned or improperly fitted, you may face frequent jams.

Examine the alignment of the lock with its strike plate. They should meet seamlessly for optimal performance. Any gaps or overlaps can lead to issues.

Next, check the screws and bolts securing the lock in place. Loose hardware can affect how well your door locks and unlocks. Tighten any loose components carefully, ensuring not to overdo it.

If adjustments don’t solve the problem, consider whether the entire mechanism was installed according to manufacturer guidelines. A poorly installed lock often requires professional assistance for a proper fix.

When Should You Call an Expert?

When dealing with a jammed or non-working garage door lock, some situations require professional help. If you’ve attempted the troubleshooting steps and nothing seems to improve the situation, it’s time to call expert technicians. It’s also a great safety measure, as you will avoid further damage.

Signs you should reach out for help include persistent issues despite cleaning and lubricating the lock or if you notice visible damage to any components. Additionally, if your garage door is making unusual sounds during operation or if there are alignment problems that you can’t fix on your own, it’s best to consult a garage door professional.

Our experienced technicians have specialized tools and knowledge that can quickly identify underlying problems. They can ensure that repairs are done safely and effectively, giving you peace of mind knowing your garage is secure again. 

Don’t hesitate to give us a call. Our local garage door repair services experts will be there in no time to assist with your lock, garage door springs, or any other issue.

Categories Posts

Garage Door Experts Help Troubleshoot a Slow-Opening Garage Door

Have you ever found yourself tapping your foot impatiently as your garage door creaks open at a snail’s pace? You’re not alone. A slow-opening garage can be a potential security risk and affect your daily routine. 

A two-story suburban house with white siding, blue shutters, and a large driveway leading to a double garage, surrounded by a neatly maintained lawn under a clear blue sky.


Whether you’re running late for work or simply want to get on with your day, waiting for it to move can feel like an eternity. And that’s where Garage Door Experts come in. We’ll help troubleshoot a slow-opening garage door and find the reason behind that sluggish performance. 

What Causes a Slow-Moving Garage Door?

Several factors can cause this issue, each contributing to its unusual behavior. We’ll list them one by one and then provide you with some tips to determine the cause and resolve the problem.

  1. Misaligned tracks

If the garage door tracks are misaligned or damaged, the door struggles to move smoothly.

  1. Debris buildup 

Dust, dirt, and grime can accumulate on the tracks over time, creating friction that causes a slower operation.

  1. Issues with the opener motor 

A faulty or worn-out motor unit may lack the power needed for quick operation.

  1. Problems with settings

If the settings are incorrectly adjusted, even a perfectly functioning motor won’t perform at its best.

  1. Environmental factors 

Extreme temperatures can affect lubricants used in garage door systems. This can contribute to that agonizingly slow opening process you dread every morning.

Troubleshooting a Slow-Opening Garage Door

A slow-opening garage can be frustrating. So, the first step is to observe its movement. Does it stutter or hesitate? This could indicate underlying issues that need attention. Now, let’s look at some of the most common reasons for this and what to do in each case.

Misaligned or Broken Tracks

As you can see from our list of reasons, misaligned or broken tracks are a common culprit. When the tracks aren’t perfectly aligned, the door struggles to move. This resistance can lead to frustrating delays.

This is why you need to check the tracks to identify issues. Look for bends, dents, or misalignment along their length. Even a small deviation can affect performance significantly.

Also, check for any signs of damage that could indicate deeper problems. A track that’s completely broken may require immediate attention to prevent further complications.

You may need to consult a professional garage door repair company if you notice persistent issues after adjustments. They have the expertise needed to resolve complex track problems effectively.

Dirty or Corroded Tracks

Garage doors glide on tracks, so they have to be clean. As we already mentioned, dust, dirt, and debris can accumulate there. This buildup slows down the door’s movement.

Additionally, corrosion adds another layer of trouble. Moisture exposure can lead to rust forming on metal tracks. Rusty surfaces create friction that hinders smooth operation.

A workspace under a vehicle lifted on ramps, with scattered tools, a heat shield, and cables on the ground, indicating automotive repair or maintenance in progress.

So, what to do? A simple routine cleaning with a damp cloth can help resolve this issue. Consider using a mild detergent and a soft scrub brush for tougher grime or rust. Afterward, make sure to lubricate the tracks with a silicone spray during regular maintenance for optimal performance. Additionally, you should ensure to check tracks for corrosion often.

Faulty or Worn Out Opener Motor

A faulty or worn-out garage door opener motor unit can significantly slow down the door’s operation. You might notice a delay if the motor struggles as the door moves. This is often caused by wear and tear.

To identify it, listen for unusual noises. Grinding or straining sounds usually indicate that something isn’t right with the motor. Further, check if the power supply to the motor unit is consistent, too, as fluctuations can also affect performance. 

Incorrectly Adjusted Opener Settings

The doors often rely on precise settings for optimal performance. If your door is opening slowly, the opener settings might be off. These control how far the door travels and how quickly it moves. When they’re not calibrated correctly, you may notice a significant delay in operation.

Sometimes, it’s as simple as tweaking your garage door opener’s force or speed setting controls. Since each model has a unique configuration process, consult your owner’s manual for specific guidance.

If you’re not confident about making these adjustments yourself, don’t hesitate to reach out to an expert who can assist you with proper calibration. They can ensure everything runs seamlessly again without unnecessary delays.

When Do I Need a Garage Door Repair Company?

Say you’ve tried troubleshooting your slow-moving door without success, it may be time to seek professional help. If the problem persists after you’ve adjusted tracks or cleaned them, this could signal underlying problems with the opener motor or other components. Additionally, a significant change in how your door operates warrants immediate attention.

Moreover, if you notice strange noises during the operation, like grinding or squeaking sounds, it’s best not to ignore these symptoms. They often indicate wear and tear that requires expert evaluation and possibly replacement parts.

A set of tools placed outside a wooden shed, including a black and yellow toolbox, a power drill, and a plastic organizer containing screws and nails, ready for DIY or repair work

Furthermore, think about safety reasons for calling for help. Garage door springs are especially dangerous as they’re under significant tension. It can be quite a risk if they malfunction unexpectedly. So, if you’re unsure about handling repairs yourself, reaching out to professionals ensures the safe resolution of any issues.

Get in touch with our garage technicians, and we’ll be there to assist you in no time.

Categories Posts

Expert Tips for Effective Garage Door Maintenance and Tune-Up

Your garage door serves multiple purposes, keeping your home or business premises and belongings safe. Yet, like any part that’s frequently in use, it needs care to keep functioning smoothly. This is where regular maintenance comes in. 

Close-up view of a garage door track and roller system, showing metal brackets and rails securely installed on a wall and ceiling for smooth door operation

So, whether you’re a DIY enthusiast or just looking for practical advice, we will give you some expert tips for effective garage door maintenance and tune-up. Let’s see what you can do to keep your garage door fully functional throughout the year.

Inspect the Tracks

First, start by inspecting the tracks. These metal pathways serve to guide your garage door up and down, so they need to be clear of obstructions. Further, look for any dents, rust, or debris that could disrupt the movement. Even a small pebble can cause significant issues. If you spot anything that’s wrong, make sure to fix it immediately.

Next, check alignment. The tracks should be parallel and level with each other. Misalignment can lead to uneven wear on the door’s components. If necessary, use a level tool to ensure everything is straight. Tighten any loose bolts or screws along the tracks for added stability.

Finally, remember to clean both sides of the tracks with a damp cloth to remove the grime that has been accumulating there since your last cleaning. 

Check the Springs

The next important part of your garage door system is definitely springs. They hold the weight of the door, making operation possible. If your garage door won’t open smoothly, this is where the issue may lay. Listen for unusual noises during the operation. They can indicate that something isn’t quite right with these parts.

You should visually inspect both the extension and torsion springs. Look for signs of wear, like rust or gaps. If you notice any damage, you should consider a garage door spring replacement. And remember to always be cautious when handling springs. These components are under significant tension, and you risk hurting yourself if you are not careful.

Lubricate Moving Parts

Regular lubrication is another important aspect of a smoothly functioning garage door. Over time, the moving parts can become dry and create unnecessary friction. This can lead to wear and tear that may require costly repairs.

You should first lubricate the rollers, hinges, and tracks. Use a silicone-based lubricant for optimal results. Avoid grease as it attracts dirt and debris, which can cause more problems later on.

Four garage door rollers with metal shafts, featuring black and metallic wheels, displayed on a concrete surface, illustrating components for smooth garage door operation

Don’t forget about the springs as well. They also need some attention. Use a light coat of oil specifically designed for garage doors to help extend their lifespan.

Check the Balance

A well-balanced door opens and closes smoothly, while an unbalanced one can strain components, leading to premature wear. This is why you need to check it regularly.

To test the balance, disconnect the garage door opener by pulling the release handle. Then, lift the door halfway up manually. If it stays in place, it’s properly balanced. If not, you will need some adjustments.

A brick garage with two white up-and-over garage doors, one closed and the other partially open, featuring decorative glass panels at the top, set against a paved driveway on a sunny day

An unbalanced garage door can result from worn springs or misaligned tracks. By regularly checking all these parts, you can catch these issues early on. And if you’re unsure about making adjustments yourself, you can always consult with professional technicians. 

Test the Safety Features

Testing the safety features of your garage door is another essential step to ensure a secure operation. Start by checking the photo-eye sensors, which should be aligned properly. These garage door sensors prevent the door from closing if an object or person is in its path.

Next, perform a manual test of the auto-reverse function. Place a small object, like a brick or wooden block, on the ground where the door would close. When you activate the door, it should reverse immediately upon contact with this obstacle.

Don’t overlook testing your emergency release mechanism as well. This feature allows you to operate your garage manually during power outages or system failures.

When Do I Need Help?

Knowing when to call in a professional can save you time and money. While regular maintenance is a must, some issues may require expert intervention. For instance, common garage door problems include:

  • Unusual noises like grinding or squeaking that persist after lubrication might signal a deeper problem. 
  • The door not responding to remote controls or wall switches. 
  • Malfunctions with the springs or tracks, which can be dangerous due to tension.
  • Visible wear on components such as cables or rollers. If any part looks frayed or damaged, don’t wait until it breaks completely.

If you’re unsure how to perform certain checks safely or simply prefer peace of mind, don’t hesitate to ask for help. Professional technicians have the experience and tools to ensure everything operates smoothly. Give us a call right away, and we’ll be there in no time!

Categories Posts

Repair or Replace? How to Fix a Damaged Garage Door Panel to Restore Functionality and Curb Appeal

Your garage door is vital to your home’s security and curb appeal. When a panel gets damaged, it can leave you wondering: should you repair or replace it? The decision isn’t always easy. 

A white single-story house with gable roofs, black shutters, and a large driveway leading to a two-car garage, surrounded by a well-maintained lawn and bordered by a wooden privacy fence under a clear blue sky

First, you need to understand the extent of the damage so that you can decide and restore both functionality and aesthetic charm. So, repair or replace? Let’s see how to fix a damaged garage door panel and when you need to install a new one.

Assess the Damage

The first thing to do is to inspect the damaged panel thoroughly. Is it a small dent, or has it suffered significant cracks? You should also check for rust or corrosion in case you have a steel door. These issues can indicate deeper problems that might require more than just surface repairs.

If the damage affects the door’s ability to open and close as it normally would, it’s time to dig deeper. Listen for unusual noises when operating the door. This could signal alignment issues stemming from the damaged panel.

Furthermore, consider how visually appealing your garage door still looks overall. A minor dent from an accidental impact may be easy to overlook, but multiple unsightly marks can detract from your home’s exterior charm. This is when you’ll want an entire garage door panel replacement.

Finally, think about how often you use your garage space. If it serves as an entry point or storage area regularly, you need to resolve issues as soon as possible. Addressing even minor damage promptly will keep everything running smoothly and looking good.

Cost Considerations

For many, the cost is a significant factor when considering garage door panel replacement. Repairs typically cost less than replacements. However, prices can vary significantly based on the extent of damage and the necessary materials. Most likely, you’ll pay less for a single garage panel than double doors.

If you only need minor repairs like patching or painting, your expenses may be minimal. On the other hand, significant dents or cracks could require the intervention of a professional garage technician and replacement parts, which adds up quickly.

A person in a green shirt holding and counting multiple denominations of U.S. dollar bills, including $20 and $50 notes, emphasizing cash handling

Additionally, don’t forget to factor in labor costs if you’re not going DIY. Hiring a skilled technician can save time but will increase overall expenses.

Also, consider that an older door might have underlying issues that could lead to additional repairs in the future. While investing in a new panel might be expensive initially, it could save you money over time if you take into account long-term durability.

Time Considerations

When faced with a damaged garage door panel, time is an important factor as well, especially if your door doesn’t operate normally. Depending on the severity of the damage, repairs can take anywhere from a few hours to several days.

If you choose to repair the panel yourself, consider your skill level and availability. Do you have enough time to dedicate to this project? Note that gathering tools and materials might add extra hours. You can overcome this issue by hiring a professional garage door repair company, but it will increase the costs, as we discussed before.

Safety Considerations

Of course, safety should be your top priority when considering a garage door replacement or repair. Garage doors are heavy and can pose serious risks if handled improperly. 

If you decide to try DIY repair, always ensure that the door is in a stable position before going further. Additionally, wear protective gear such as gloves and safety goggles to shield yourself from sharp edges or falling parts. If you’re using tools, make sure they’re in good condition to prevent accidents.

A white hard hat, yellow and black safety gloves, and a green lanyard with a carabiner placed on a construction surface, representing essential safety gear for garage door repair

If you’re unsure about managing the repair yourself, consider hiring a professional. They have the skills needed to handle potentially dangerous situations safely. Safety reasons are the most common ones when we ask why clients decide to opt for a trained garage door technician.

Needless to say, keep children and pets away from the work area during repairs. It’s easy for them to get curious and wander into harm’s way without realizing it.

What To Do If I Am Still Unsure?

If you’re still unsure about whether to repair or replace your damaged garage door panel, consider a few key factors. You can consult with a professional who can accurately assess the damage and provide an expert opinion on the best course of action. Additionally, think about how long you plan to stay in your home. If it’s only for a short period, the repair might suffice.

Reflect on the overall aesthetics of your property as well. A mismatched panel could detract from curb appeal, whereas a new one might enhance it significantly.

Finally, trust your instincts. If you’re leaning towards replacement due to extensive damage or age, go with that gut feeling. It’s better to invest in something that adds value rather than settle for temporary fixes that may lead to more problems down the line. 

Book your free quote with our experienced technicians, and we’ll ensure to provide you with a detailed estimate of all costs. This way, you’ll be able to make an educated decision.

Categories Posts

How to Adjust Garage Door Springs

Garage Door Repair in Chelsea, MA

Having the right tension on your garage door springs is an important part of maintaining a safe and reliable garage door. If your garage door is not functioning properly, it may be due to the tension in the springs being too tight or too loose. Fortunately, adjusting the tension on your garage door springs is a relatively straightforward process that can be done with a few simple tools. In this blog post, we will go over how you can adjust the tension on your garage door springs yourself.